My House Was Destroyed Before Closing: 10 Steps to Resolution
- Published on
- 3 min read
-
 Syndie Eardly Contributing AuthorClose
Syndie Eardly Contributing Author
Syndie Eardly Contributing AuthorClose
Syndie Eardly Contributing AuthorSyndie Eardly is a veteran journalist and legal reporter with more than 20 years’ experience, writing for the real estate, mortgage and title insurance industries. She has helped launch several online publications, including DoddFrankUpdate.com, which was launched after the Great Recession to cover the many legislative efforts that followed. Syndie resides in Cleveland, Ohio, where she enjoys the lively restaurant scene, spending meditative time on the beautiful shores of Lake Erie, and hiking in the Emerald Necklace and Cuyahoga Valley National Park.
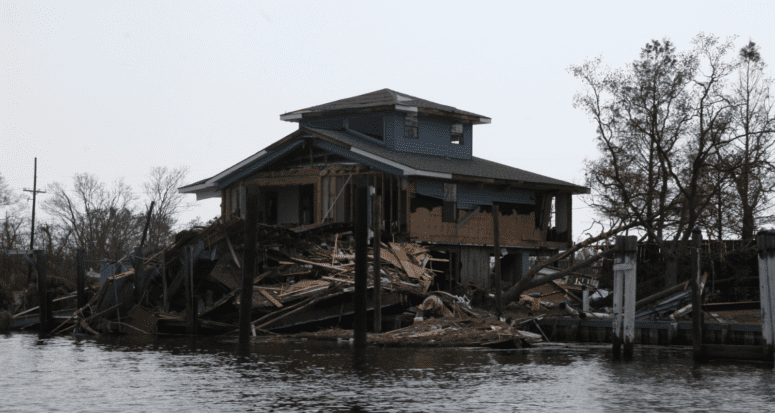
A homebuyer’s biggest nightmare is the discovery that the home they are about to close on has suffered major damage or — worst-case scenario — has been totally destroyed.
From natural disasters, such as hurricanes, wildfires, or earthquakes, to deliberate destruction, accidental fires, or broken pipes, when a home under contract suffers significant damage before closing, the buyer must quickly determine the best course of action.
There is no better ally in this situation than your real estate agent. You will have a lot of questions (and even more decisions to make) if confronted by a house damaged or destroyed before closing.
To help examine your options, we have asked Greg Clark, a real estate agent with the Keller Williams Patriot Group in Waco, Texas, to share his experience and offer 10 action items you will want to consider.

Step 1: Call your real estate agent
The first action item is to call your real estate agent, who will help you assess the situation.
“A few years ago, a friend of mine listed his home, and it went under contract,” Clark recalls.
“It was already through inspection when it caught fire one afternoon. Once it got started, it burnt to the ground because the metal roof kept all the flames down. The embers got between the walls and the cedar plank. The thing was done.”
In that case, Clark noted, the buyer terminated the contract. But in the case of partial damage, there are many things you must weigh before deciding to move forward.
Step 2: Determine the extent of the damage
If the house is completely destroyed, you will likely be advised by your real estate agent to terminate the contract.
Generally speaking, real estate contracts or purchase agreements contain clauses that permit termination of the agreement if the seller is unable to turn over the property in the condition it was in when the buyer made the offer.
According to Clark, if the damage is serious, you must figure out if this house is still going to work out for you even if repairs can be made. Depending on the extent of the damage and the time needed to complete the repairs, you may decide it’s best to move on and find another home on the market.
On the sellers’ side, they must determine what it is going to cost them in time and money to repair the damage.
“There has to be an understanding on both sides of the deal,” Clark says. “As a real estate agent, you have to realize that you’re not just dealing with paper. You are dealing with people’s lives. So, it is important to give the buyer and seller plenty of time to gather information and make good decisions.”
TIP: One of the main things to consider is where you will live in the interim. If you have sold your home or terminated your lease, you may have to find temporary housing, an additional expense you must consider.
“Ultimately, it’s what’s best for our buyer,” Clark said. “If they truly want the house, we help them find a short-term rental — or they stay where they are at, if they can, while we get it fixed.”
Step 3: Refer to the purchase agreement
Once you know the extent of the damage, you will sit down with your real estate agent and review the purchase agreement. The agreement will contain specific details stipulating when you can back out of the deal without losing your earnest money as opposed to when you will be expected to proceed.
Typically, if the damages exceed a specific monetary amount or percentage of the value of the home — for instance, 5% or 10% — then the buyer has the option of backing out without a penalty.
If the cost to repair is less than that amount, the buyer will be expected to proceed with the sale, as long as the seller completes the repairs.
“The seller is going to be responsible for getting the property back up to the condition it was when they went under contract,” explains Clark. “The onus is on the listing agent and the seller to get it fixed; otherwise, the buyer can just move on and the seller is left with an incomplete house.”
Step 4: Figure out the insurance situation
It is the seller’s responsibility to set things in motion. They will first have to contact their insurance company to make a claim.
“The seller will have homeowners insurance, and they should get some compensation from the insurance company to make repairs,” Clark said. “You’ll want to understand what kind of insurance they have, and what it will cover.”
If you are days from closing, getting those repairs accomplished in time could be a challenge, but you still have options. You can work with your lender and the seller to delay the closing to allow for the repairs. If a delay isn’t possible, you can negotiate who will handle the repairs — buyer or seller.
“The seller could get the insurance proceeds and use them to make repairs,” Clark notes, but there are options if the repairs cannot be completed prior to the closing.
“If you decide to buy the house, the proceeds could go to you instead, and you will make the repairs.”
Clark offered an important caveat, where insurance is concerned.
“If the roof is damaged, I’d be pushing to get it fixed before closing, because it will affect your homeowners policy,” he explains. “You don’t want your roof excepted from coverage in your policy. As a buyer, you want a full cost replacement policy on your roof.”
TIP: In addition to the insurance settlement, you should also negotiate a credit back to you from the sale to cover any insurance deductible that may be incurred if you take on the repairs.
Step 5: File the necessary reports
There are some situations in which the house may have been damaged by something other than a natural disaster — for instance, an accident, or deliberate damage by the seller or a renter.
In addition to filing claims for insurance, the seller or buyer may need to file police reports, something the insurance company will later rely on to seek redress in court for any damages they will be covering.
Step 6: Get an inspection… as many as you need
The insurance company will send a claims adjuster to look at the damage and let the seller know what the insurance company will cover.
This is a good first step, but you should get your own inspection, as well. An independent inspection may uncover ancillary problems related to the damage that the insurance company may fail to consider.
TIP: Don’t stop at one inspection! If there is serious damage, you may want specialists to come in and look at the foundation, for instance, or the roof structure.
Step 7: Solicit repair quotes
The next step is to reach out to contractors to solicit quotes for the necessary repairs. It is vitally important to understand not only the total cost to repair the damage, but also the timeframe.
“It is up to the families to decide if it is worth it to make this thing happen, or if everybody just goes their separate ways,” Clark says. “The seller may realistically say they have to take the house off the market for a bit to get it repaired, and then put it back on the market.”
Step 8: Talk to your lender
Contact your lender as soon as possible to apprise them of the situation. They will be a valuable ally as you make a decision about whether or not to proceed with the purchase.
“It’s not going to close if there is major damage,” Clark says. “The lender won’t let it happen.
“ They will track the appraisal based on what has happened. They can terminate based on a failure to meet the appraisal requirements. The lender has to be smart. They’re protecting their investment.”
On the other hand, if the home can be fixed, your lender may have an option to finance the repair or allow the seller to complete the repair prior to closing.
However, any delay in closing could cost you more money in the long run.
“You may have locked in your interest rate for a certain period of time, and you’re likely to lose that lock,” Clark explains. “You may end up paying more for the loan just to keep it going. I recently closed on a home that was delayed almost 11 weeks due to estate problems. The buyer had to pay more money to the lender because they thought they were going to close in March, and they ended up closing in May.”
Either way, the lender will probably insist on another appraisal before agreeing to move forward.
Step 9: Get an appraisal
Even if the lender decides the original appraisal will stand, you will likely want to get another appraisal, especially if the repairs result in a significant delay on the closing.
Home values can shift even in a short period of time, and you’ll want to make sure the house, especially one that has incurred damage, is still worth what you are offering.

Step 10: Take a final walkthrough
In every home purchase, you should insist on a final walkthrough before going to the closing. This is doubly important when the sale is contingent on agreed-upon repairs.
While your real estate agent will accompany you on the final walkthrough, you may also want a knowledgeable inspector or home repair professional to review the work.
Clark acknowledged these can be tough situations for everyone involved.
“There are a lot of moving parts with families,” he says. “As a real estate agent, you’ve got to put the business on the backburner and just take care of the people first. Then figure out the best way to move forward.”
Header Image Source: (U.S. Fish and Wildlife Service Southeast Region / Flickr)
At HomeLight, our vision is a world where every real estate transaction is simple, certain, and satisfying. Therefore, we promote strict editorial integrity in each of our posts.