How to Sell a House with a Small Kitchen: No Major Renovations Required
- Published on
- 7-8 min read
-
 Emma Diehl Contributing AuthorClose
Emma Diehl Contributing Author
Emma Diehl Contributing AuthorClose
Emma Diehl Contributing AuthorEmma's work has been featured in Huffington Post, NPR and XOJane. When she's not combing her neighborhood for open houses, she's writing about technology, real estate or data.
American kitchens have evolved dramatically over the years. Once a utilitarian workspace where mom spent her days over the stove, the kitchen is now considered the social center of the home where design and style matter.
Since the 1960s, the average kitchen size has more than doubled from 70 to 150 square feet. According to a 2019 study by the National Association of Home Builders, 86% of buyers today prefer an open kitchen layout complete with stainless steel appliances and granite countertops.
If you have an older or more modest house, however, it’s possible that your kitchen hasn’t kept up with the times. You keep hearing that it’s too small to attract an offer. That puts you in a tough position when the time comes to sell—should you invest in overhauling it to appeal to the modern buyer?
HomeLight data indicates that’s not always a smart move. Top agents say the ROI on a $23,000 kitchen upgrade is actually -1%, meaning you’re bound to lose money on any major kitchen renovations. Plus, due to the rise in food delivery services, there’s some evidence suggesting small kitchens are making a comeback. Who has time to cook anymore?
If you get the same feedback from buyers about the size of your kitchen, turn to these tricks top real estate agents, professional stagers, and interior designers vouch for. By the end, you’ll know exactly how to sell a house with a small kitchen.
Did we mention there’s no sledgehammer required?

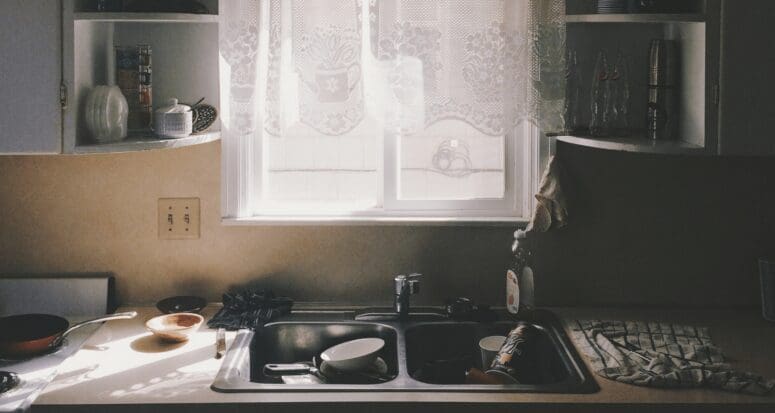
1. When you think your counters are clear, check again. What else can you remove?
Any amount of clutter is going to make a small kitchen feel even tinier.
“Make as much counter space as you can,” says Justin Riordan, interior designer, architect and founder of the Portland-based home staging company Spade and Archer Design Agency. “While the counters should not be empty, they should never be cluttered.”
To give the illusion of more space, follow this simple step by step:
Clear clutter and junk from counters.
Kitchen counters become home to junk mail clutter, coupons, party invitations, and old newspapers.
Clear off anything from your countertop that isn’t kitchen related. Papers can be recycled, stored, or take a picture of them on your phone if you’ll need the information later on. Can’t part with that stack of printed and clipped recipes? Opt for a minimalist recipe box to keep them organized with style.
Depersonalize refrigerators and other magnetic spaces.
You might love your kitschy magnet collection that tack on last year’s holiday cards to your fridge but it’s that kind of personalization that can turn buyers off.
Take down family photos and magnets from surfaces and store them for your future home. Put in some elbow grease and remove any stickers from appliances.
Maximize floor space.
If you’ve got a bulky trash can or recycling bin taking up precious real estate on your kitchen floor, check out The Wirecutter’s top reviewed in-cabinet trash cans to save floor space.
Remove countertop appliances.
You might’ve cleared clutter and junk from your countertops, but gadgets like coffee makers and toasters have to go as well. Pack these appliances away in storage, or find them a home in cabinets, space permitting.
Artfully decorate your cleared space.
In regards to staging your countertops, “one item per surface will make the kitchen look functional and spacious,” says Riordan.
Prop open a popular cookbook on a stand for a pop of color, display a vase with fresh flowers, or place a small glass bowl with fruit on an open surface.
2. Ditch the island, seriously.
If you have an island in your kitchen, get rid of it for pictures and showings. While your floating island might be a necessity for storage and prep on a day to day basis in your kitchen, it’s not helping you sell the home.
“Here’s the rub: Nobody will be cooking in the home during showings or open houses. Adding a few feet of counter space is not worth the price of making the kitchen seem cramped. If you shoe-horned in a makeshift island, just shoe-horn that baby right out to your garage,” suggests Riordan.
This removal might feel weird or illogical, but ultimately, the goal is to open up space in the kitchen, not showcase a functional kitchen.
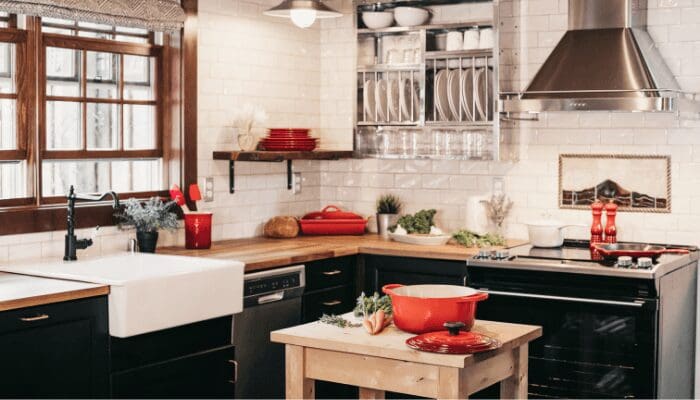
3. Paint it white.
Every interior designer, professional stager, and real estate agent we spoke to agreed—if you want your kitchen to look bigger, white paint is your best friend.
“The more white you have, the cleaner and more open it will feel. Removing the hard edges in the space will make the kitchen actually feel bigger,” Riodran says.
White will not only make the space look larger, but will also complement nearly any accent color—making it easier for buyers to visualize their linens, china, and kitchen accessories in your home.
If your backsplash has a loud, or busy pattern, consider retiling it a calming white to match the walls, advises Caryn Schulberg, studio director of Stone Interiors, a luxury interior design studio in San Francisco.
Home Depot has a wide range of classic subway tiles starting at $1. If that’s outside your budget, consider stick-on tiles from Art3d or LongKing on Amazon.
When it comes to painting the walls, Schulberg swears by “Winter White” from Benjamin Moore with a semi-gloss sheen. “This variation of white is ever-so-slightly tinged with a soothing, cool grey,” she says.
Here’s the simplest way to prep your kitchen walls for repainting:
- Kitchens, especially small ones, are more likely to have grease and grime on their walls. Scrub the walls down with a kitchen sponge to make sure there’s no residue before painting.
- Mask or tape along the floors, ceilings and countertops.
- Place a drop cloth on the floor to keep drips from dripping and staining.
- Use plastic sheeting or masking draped over appliances and large cabinets to protect them.
- Start painting!
If you can repaint the cabinets, opt for a white or very light grey.
“Make sure you paint both the outside and the inside of the cabinet doors a light color,” says Schulberg. With nearly 100 years in the home improvement space, Lowe’s has an easy step-by-step video on prepping, priming, and repainting your kitchen cabinets.
4. Invest in good organizers
Your kitchen might be small, but with mighty organization skills, you can keep buyers from wondering whether there’s enough room in the pantry or space in the drawers.
“Well-thought-out organizational components will eliminate the need for potential buyers to question where they will store everything if they choose to purchase the house,” explains Schulnberg.
When organizing shelves and drawers for showings, you should prioritize:
Pull-out racks under countertops for pots and pans
Pots and pans can take up tons of cabinet space when not organized efficiently. Made of metal or wood, you can purchase cabinet organizer kits, or build them from scratch. Not up for DIY?
Check out these alternatives:
- Lynk Professional Organizer Pull Out Under Cabinet Shelf
- Rev-A-Shelf Metal Cabinet Organizer
- Simply Put 1-Tier Wooden Cabinet Organizer
- Simply Put 2-Tier Pull Out Metal Organizer
Most importantly, you’ll need to take exact measurements of the width, depth, and height of your cabinets. Then make a plan of what systems you’ll use before installing them. With a level, a screwdriver, and a tape measure, you can install these in an afternoon using this beginner installation guide.
Wall shelves for plates and glasses
If your cabinets don’t have much shelving, plate and glass racks can double the amount of storage with little effort.
Rather than stack mismatched glasses and plates on top of each other into piles, you can neatly arrange the cabinets for a clearer display.
Measure the height and width of your cabinet, and find a shelf that can fit within your dimensions. Then slide it into your shelves—there’s no additional installation required.
Online buying guide The Strategist recommends YouCopia StoreMore Height Expandable Kitchen Shelf Organizer.
Organizers inside of drawers for tools, utensils, and flatware
Dividers can take the chaos of your kitchen drawers and turn them into manageable, spacious spaces. However, they’re not all built the same. Consider a few different kinds of organizers to tackle tidying your drawers.
- Best Utensil Divider:
Home-it’s expandable flatware divider can expand to fit the width of your drawer, making it simple to install. - Best Tool/Gadget Divider:
Adjustable drawer dividers, like InterDesign’s adjustable set, make it easier to store oddly shaped gadgets and tools. - Best Wrap and Bag Organizer:
RubberMaid’s Cabinet Organizer uses the back of your cabinets with a mounted storage rack for aluminum foil, cling wrap, and garbage bags. - Best “Do it All” Junk Drawer Divider:
Tame your junk drawer with interlocking organizers like Madesmart’s set. Use the dividers that snap together, making it simple to customize the set to your space.
Most people have a hard time imagining how their things might fit into a space, so giving them an idea might make the sale easier.
“It is a small step that makes a big difference when people feel they do not have to take on the organizational challenges on their own,” Schulberg says.
5. Remove dated accents and update with modern finishes.
No need to rehaul the design of your kitchen space. Just change out accents and finishes for a modern touch.
“Definitely stay away from frosted glass light fixtures, multi-color mosaics, ornate hardware and swirling or circular lines—all of these things harken towards more traditional features or fads of past times,” recommends LA-based eco-friendly interior designer Erica Reiner.
Give your kitchen a small modern update with stainless steel drawer handles. Reiner recommends the European bar-style pulls for an expensive look for less.

6. Make windows the focal point.
Open up the space by accentuating natural light and windows. Remove old, heavy, or outdated window fixtures. Replace old blinds with a light or white colored wood, such as:
- The Cordless Celestial Sheer Double Layered Shade offers privacy and rolls up completely to provide a clean design. It’s consistently one of Houzz’s best sellers.
- Levolor’s Faux Wood Blinds resemble wood, but are more durable. They’re also The Spruce’s top pick for budget blinds in 2019.
- Deluxe Cordless Faux Wood Blinds are award-winning blind provider Blindster’s best selling model.
Or, you could hang simple, gauzy light or sheer curtains on a modern rod:
- Threshold’s Linen Grommet Sheer Curtain Panel comes recommended by interior designers by New York Magazine’s sister site the Strategist. The neutral palette can make your kitchen look larger, and the linen panels can be machine washed for easy upkeep.
- Mystic Home’s sheer curtains are a top seller on Amazon and offer a balance between privacy and light.
For the illusion of more space, Home Guides from SF Gate, a sister publication to the SF Chronicle, recommends that you pick curtains with vertical design elements, hang them high, and open the curtain rod as wide as it will go to make any windows appear larger.
7. Install new light fixtures.
A small kitchen will look even tinier when there are shadowy or poorly lit corners in the space.
While you update your fixtures, put some TLC into your lighting to make your smaller space appear brighter and bigger.
First, swap out any decorative lighting fixtures with modern, decorative lights, like this top-selling KingSo spherical light, or the Staunton 1-Light Pendant, a top recommendation from Houzz.
If you’re not experienced with electrical work, you might want to hire an electrician to get the job done right. Professional light installation, on average, costs less than $100 a visit.
After that, add under-cabinet lights to rid the space of shadows. If budget and time is a concern, you can install affordable LED under-cabinet lights that operate with battery, no electric work required.
GE’s under cabinet lights are top reviewed and require only a simple installation, or Brilliant Evolution LED Puck Lights stick on and can be installed one at a time.
8. Ditch oversized appliances.
You might’ve already cleared small appliances such as toasters, drip coffee makers, and blenders from your countertops, but also consider removing large appliances that stick out in your space.
“Every once in a great while we deal with a vintage kitchen that was never designed to have a modern refrigerator. In this case we simply remove it and let the buyer figure out that it is missing,” Riodran shares. “You would be amazed how many buyers never notice that it’s not around!”
It’s extreme, but removing a fridge or a portable dishwasher from the space is cheaper and faster than remodeling an outdated and small kitchen. With the less is more approach, buyers have the chance to visualize what they’d do instead of only seeing limitations.

9. Remove overhead cabinets and create open shelving.
You might not have the time or budget to replace your kitchen cabinets, but you can take off the doors of high-placed overhead cabinets in your kitchen.
Show off your now meticulously organized shelves above in a few quick steps:
- Use a screwdriver on the cabinet hardware to remove the doors. Depending on how many cabinets you have and what you need to store, you might choose to keep a few doors on to store less photogenic kitchen tools like canned food or baking sheets.
- Depending on the build of your cabinets, you might be left with middle stiles. If so, you can cut these out using a double-edged pull saw. With the stiles removed, you’ll have large, open shelves in place.
- With a putty knife or similar tool, get rid of splinters and loose wood from around the stiles and where the hinges used to be. Fill in any divots or holes with putty, then sand it over to smooth it out.
- From here, you can add a trim around the shelves using a nail gun, or leave it be if you want a simpler finish.
- Use caulk to fill in any seams in the trim or gaps. Paint the cabinets once the caulk dries.
Need a visual to picture it? Fourth best-selling magazine in the US, Better Homes and Gardens has a quick one-minute tutorial.
10. Revisit your price
In a recent survey, 58% of buyers who purchased a home in the past year ranked buying a home their preferred style of kitchen as “extremely or very important.” Having a desirable kitchen is a major selling point in a home.
If even after making some of the above changes, you’re still getting feedback on size, then you have a few options to consider:
- Invest in heftier renovations to attract buyers.
If you’re not bound by a tight timeline, you could take your home off the market to make some larger renovations on the kitchen.If your structure allows it, you might “pull down some cabinets or open up a wall to make that change and flow out into the family room,” suggests Chris Minteer, top-selling Fort Worth-based agent with over three decades of experience. Depending on the market in your area, you might need to.“In our area, we’re going into a market where we’re seeing more competition, so sellers are going to need to be a little more focused on the condition of the property,” explains Minteer.If you’re in a buyer’s market, renovating portions of your kitchen could make your listing more competitive. - Adjust your price.
Time might not be on your side, and in that case, you could consider reducing the price of your listing. Work with your agent to research the market and similar listings that sold. Depending on the price point of your property, the condition of the kitchen might not be as relevant for your market.“That’s part of the counseling that happens in a listing appointment,” Minteer says.With a comparative market analysis from your agent, you can get a better idea of how your home should be priced with the kitchen as it is. If you’re in a buyer’s market but don’t want to pay for renovations, that might mean reducing the listing price.
Small kitchen owners, don’t despair!
The key to selling your home with a small kitchen is bridging the mental gaps for the buyer. Use white, clean surfaces and simplify design and storage wherever you can. The more work you can do on behalf of the potential buyer the better.
Instead of buyers coming in and wondering where they might store their pots and pans in the small kitchen, create that space for them. Make it easy to visualize a clear, organized life in that small (but mighty) kitchen.
Header Image Source: (Greg Rakozy/ Unsplash)
At HomeLight, our vision is a world where every real estate transaction is simple, certain, and satisfying. Therefore, we promote strict editorial integrity in each of our posts.