A New Homebuyer’s Guide to the Best-Looking Walls in the Neighborhood: Tips for Arranging Wall Art in Your New House
- Published on
- 6 min read
-
 Melissa Holtje Contributing AuthorClose
Melissa Holtje Contributing Author
Melissa Holtje Contributing AuthorClose
Melissa Holtje Contributing AuthorMelissa enjoys using her experience as a house flipper, investment buyer, and waterfront home owner to help buyers and sellers thrive in the housing market. When not scouting real estate, you’ll most likely find her at the beach.
Moving into a new home means making many decisions that impact your new space. After setting up the furniture and conquering the closets, sometimes arranging the wall art can feel overwhelming. Who wants to hang artwork when you’ve spent the day unpacking boxes? And with so many blank walls, how’s a homebuyer supposed to begin?
To help make the art-hanging process a little easier, we researched interior decorating trends and talked with Andrew Oldham, a top-performing California real estate agent, and his associate Sri Shankar, who’s also an expert interior designer.
Oldham says, “It’s amazing how art can affect you emotionally in a house. I can remember clearly the homes that I’ve walked into that had great art on the walls. The art created this energy that made it feel like this was a dynamic, exciting place to live.”
It’s so important to get the art right! These combined tips will help guide your art decisions to create an ambiance of connection and memorability.

Lay out your options
First, pull out all of your hanging art pieces and put them in a central location.
Some artwork that you had in the bedroom of your old home may look better in the living room of your new home, so it’s best to see all your options in one place. Don’t forget any unframed, non-traditional pieces that you wish to incorporate on the walls.
Once you’ve got all your options out in the open, start playing around with general placement.
Those who prefer a hands-on approach may want to physically hold up pieces to the wall, then set them on the floor below their intended space. Swap pieces around until you find the best spot for everything.
Tech-savvy homebuyers may instead want to utilize virtual wall hanging apps, such as iArtView or ArtPlacer or OhMyPrints. Using virtual tools can help you gain a better perspective and could save you the effort of physically moving things around.
Choose the right piece for the right wall
Sometimes it can be tempting to play favorites with art pieces. But just because the framed landscape from your honeymoon will always hold a special place in your heart, that doesn’t mean it should always be the focal point of your living room.
In fact, good art poorly placed can end up looking like bad art. And you don’t want that happening to your treasured wall hangings!
Instead, while you’re thinking through the general layout, keep some interior design basics in mind for the best overall look. That way, each piece shines with its own individual beauty to create overall harmony in the space.
Proportions
Working with proportions means being mindful of scale. Simply put, a big wall needs big art and a small wall needs small art.
“I’m a fan of big art pieces,” Oldham says. “A big piece of art attracts your eye and makes a statement.”
Big art pieces are great above fireplaces or on long, empty walls. But keep in mind this doesn’t necessarily mean you need one huge piece on your biggest wall; groupings of art can work together to achieve proper proportion.
In addition, keep the proportion of furniture in mind. Long sofas and buffet tables will need proportionately wide art hanging above them. As a general rule, wall art should be approximately 50% to 75% of the width of the furniture beneath it.
Measurements
Pull out your measuring tape, because measurements matter when hanging wall art!
Art that is positioned incorrectly on the wall creates chaos and imbalance for the eye. Ideally, art should be hung between 57 to 60 inches above the floor for proper “eye level,” or there should be 6 to 8 inches between the top of the furniture and the bottom of the frame.
Also, make sure that each piece or grouping is centered on the wall (or over the corresponding furniture) by measuring the total width and marking the midpoint.

Color
Use color to its full advantage when choosing places for your wall art.
Shankar says she prefers to use lighter colors in order to make rooms feel bigger, while sometimes adding a burst of color with wall art.
“It depends on the style of the home,” she says.
“But usually, the lighter the colors are, the more appealing a room tends to be. Primary colors tend to make a room feel small.”
Brush up on those color wheel concepts you learned in grade school, then consider these interior design color schemes to create overall cohesion throughout the room.
Complementary
Combining colors opposite each other on the color wheel can give that “pop” designers are always talking about. Red with green or blue with orange are great examples. A way to find three-way complementary colors is to use the “split complement” scheme, which uses the two colors adjacent to the base color’s complement.
Analogous
Mixing colors that are adjacent on the color wheel can help a space feel unified without being monochromatic. A red, orange, and yellow palette, for example, could evoke feelings of overall warmth.
Triadic
For a bolder choice, pair colors with equal distance between them on the color wheel. For example, primary colors (red, blue, and yellow) might look great in a child’s room.
Square/rectangle
Double complementary pairs can also make for a lively combination. Often incorporating this much color in art works best when you have neutral walls.
Monochromatic
Different tones of the same color can be very soothing to the eye and may help accentuate another aspect of the room, such as the architecture or furniture.
Basically, wall art should not simply be chosen for its size, but also for the way the colors work within the rest of the space. Mix and match your pieces with colorful purpose.
Arrangement
Since the walls in your new home are likely different from those in your previous home, you’ll need to play around with your art arrangements.
A set of three frames that used to hang together horizontally in your last place may need to be rearranged to hang vertically in your new place. Group, ungroup, and regroup your art until you find a suitable arrangement for each wall.
Shankar also recommends arranging mirrors in strategic places.
“A nice mirror gives you the feeling that the room is much bigger than it really is,” she says. “It makes you feel like you’re walking into a grand room.”
Arrange mirrors in places where they will catch and reflect the light or where they can intentionally elongate a room.
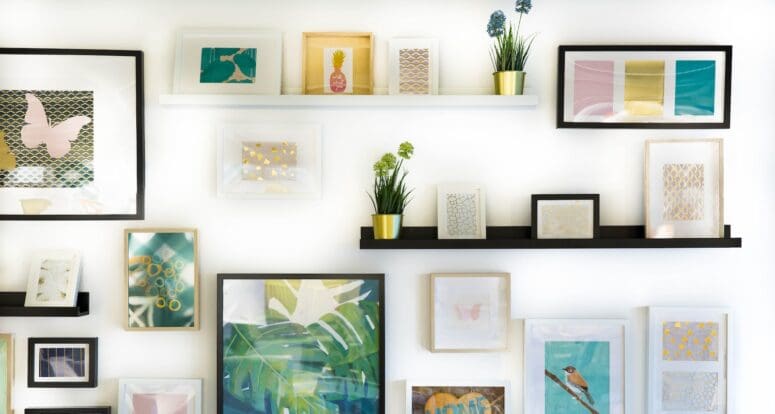
Create gallery walls
A gallery wall refers to a collection of multiple pieces of art grouped together on one wall in an intentional way. Gallery walls are an excellent way to showcase smaller pieces of art but still maintain proper proportions on larger walls.
Gallery walls can also be a good way to make a big visual impact on a smaller budget. Single large art pieces are often quite expensive, even in big-box stores. Smaller pieces tend to be more affordable and may work with what you already own.
Gallery wall tips
Find a centerpiece
Consider what you want to be the focal point of your gallery wall and work outward from there.
Go for balance
Exact symmetry is fine, but it’s not always necessary for gallery walls. Instead, work to balance general sizes on each side of your focal point.
Don’t line up edges
Unless you’re going for exact symmetry, consider off-setting the frame edges for more of a collage-type look.
Think through spacing
As a rule of thumb, space your pieces around 2 to 3 inches apart. Any more space makes the gallery feel sparse; any less makes it feel crowded.
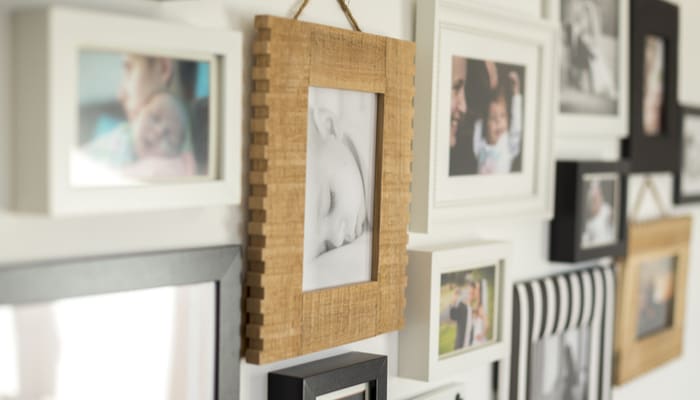
Don’t be too matchy
Frames don’t always have to match on a gallery wall. But be sure to intersperse frame colors in order to achieve balance.
Incorporate non-framed pieces
Wreaths, window panes, shadow boxes, sculptures, textiles, and even wall decals can all work together to make a great gallery wall.
Use paper first
Tracing your pieces on craft or butcher paper will allow you to play with spacing and arrangement without putting unnecessary holes in your wall.
Gallery wall themes
Gallery walls don’t always need a theme. But sometimes it’s easier to think through groupings when you choose one visual topic.
Kids’ art
Frame special drawings and paintings for a gallery wall that grows over the years. This might be a great theme for a long hallway.
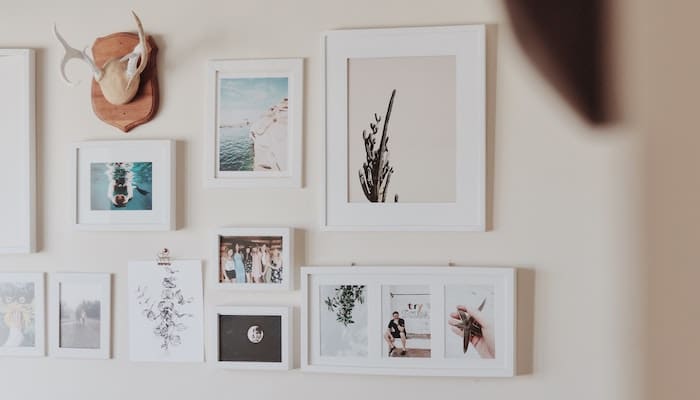
Portraits
Family portraits always make for an interesting gallery. Consider a portrait theme for stairways or family room walls.
Sports
Photos, publicity clippings, and memorabilia can be grouped together for a fun tribute in a rec room, office, or basement.
Travel
Location paintings, maps, and souvenirs could create a gallery wall that’s full of conversation starters. The living room, dining room, or foyer could be a great spot for a travel gallery wall.
Subject
Collecting artwork around a specific subject — such as flowers, animals, or landscapes — is a great way to organize a gallery wall. Bedrooms or bathrooms might be ideal for a subject-specific gallery wall.
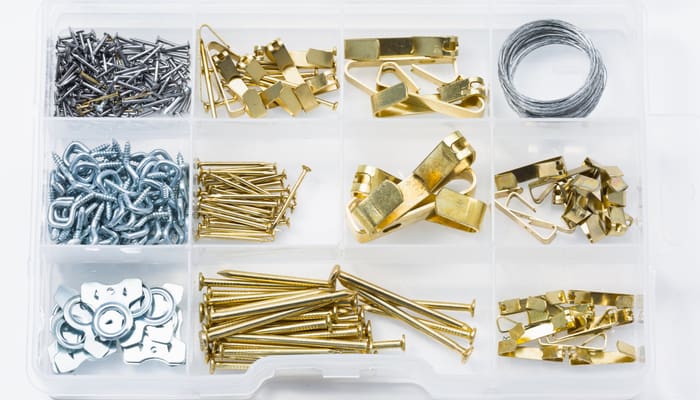
Gather the right tools
Once you’ve decided upon the placement of your wall art, it’s time to get serious about putting things up. Get your tools together to hang your art correctly and securely.
- Hooks/nails/hanging strips/screws/anchors: Make sure you have the equipment that corresponds to your particular wall type and art weight. Have plenty on hand before you begin so you don’t have to hunt for them later.
- Hammer/drill: You gotta get those hangers into the wall somehow!
- Pencil: Small, erasable guide markings on the wall make the process easier.
- Level/laser level: Don’t “eyeball it” when it comes to keeping things straight! Use a level to maintain proper perspective from all distances.
- Measuring tape: Remember your rule-of-thumb measurements for height and distance spacing. For frames with multiple back hangers, measure each one from the center of the frame and mark on the wall.
- Painter’s tape: If you’re hanging multiple frames at the same height, save time by making a leveled line out of painter’s tape.
Break the rules
At the end of the day, your new home is exactly that — yours! If you want to deviate from a color scheme or create an imbalanced gallery wall, go for it!
After all, sometimes the most pleasing art comes from breaking the rules, so give yourself the freedom to get creative with your wall hangings. Your home is your own work of art!
Header Image Source: (Unsplash.com/Jonny Caspari)
At HomeLight, our vision is a world where every real estate transaction is simple, certain, and satisfying. Therefore, we promote strict editorial integrity in each of our posts.