How to Make a Home Emergency Evacuation Plan in 5 Steps
- Published on
- 9 min read
-
 Astrid Storey Contributing AuthorClose
 Astrid Storey Contributing Author
Astrid Storey is originally from Panama and spent most of her early years traveling through Central and South America. She arrived in Denver in 2003, the day after graduating college. During the next decade-and-a-half, she’s juggled a career in a variety of creative and marketing roles while building her own studio, Storey Creative, with clients in real estate, health care, publishing, and tech.
It’s the middle of the night in early July, and your partner, children, and pets are all asleep inside your house. The sound of fireworks draws you to your back patio, where you see lights blooming in the sky … and smoke and flames making their way across the dry landscape that leads up to your property. Are you panicking yet? Or do you have a home emergency evacuation plan ready for this very scenario?
Wherever you’ve chosen to reside in the United States, headlines about natural disasters like wildfires, flooding, earthquakes, tornadoes, and hurricanes tend to permeate the news cycles seasonally, at a rate that continues to accelerate with the effects of climate change.
With every changing season, the risks move from one area of the country to another.
Being prepared to make decisions in case of emergency can mean the difference between life and death for the members of your household. This is why you should consider having a predetermined home emergency evacuation plan that’s tailored to your needs and location.
Let’s go through the overall steps you can take so you aren’t overwhelmed if disaster ever stares you in the face. For this article, we will refer to The National Center for Disaster Preparedness 5 Action Steps to Personal Preparedness framework to help you think, plan and execute on your emergency plan.

Step 1: Be aware of your surroundings and know your risks
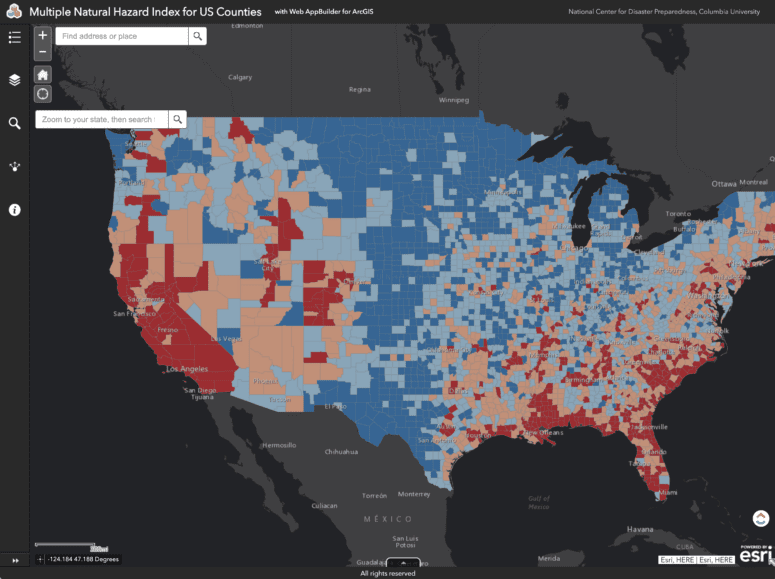
Your specific location, down to your county, city, and ZIP code, has its own index for hazard maps. You can use the Natural Hazard Index for US Counties online tool, built by the National Center for Disaster Preparedness at Columbia University, to zero in on your area of the country.
The tool is capable of estimating an overall hazard index, and it also breaks down the risk into different categories:
- Wildfires
- Volcano
- Tornado
- Snowfall
- Landslide
- Hurricane
- Heatwave
- Flood
- Long-term drought
- Earthquake
- Avalanche

In addition, the Red Cross also has a map with preparation and protection tips to help you be ready for emergencies.
What about out-of-the-ordinary or human-made emergencies?
There are the disasters you know are likely — and then there are emergencies that manifest seemingly out of nowhere. If you can, it’s best to be prepared for every likelihood, because you simply never know what might happen in your area. A couple of examples:
In April 2019, every single school district in the Denver metro area was placed in lockdown while a “massive manhunt” was underway for a self-described Columbine enthusiast, sending thousands of parents into a tailspin of uncertainty.
In February 2021, the state of Texas — prone to hurricanes and heat waves — was hit by a once-in-a-century winter storm that paralyzed the state and killed more than 50 people who froze to death when the overextended power grid collapsed under the demand for electricity.
Should you stay or should you go? Listen to the experts
All of these natural or human-made emergencies create different conditions that will require either sheltering in place for a period of time, or evacuating your property with only the basics. Your household should be prepared for both scenarios.
Your local public safety officials will use one or a combination of the following strategies to alert you of the situation of serious emergencies and provide you with instructions.
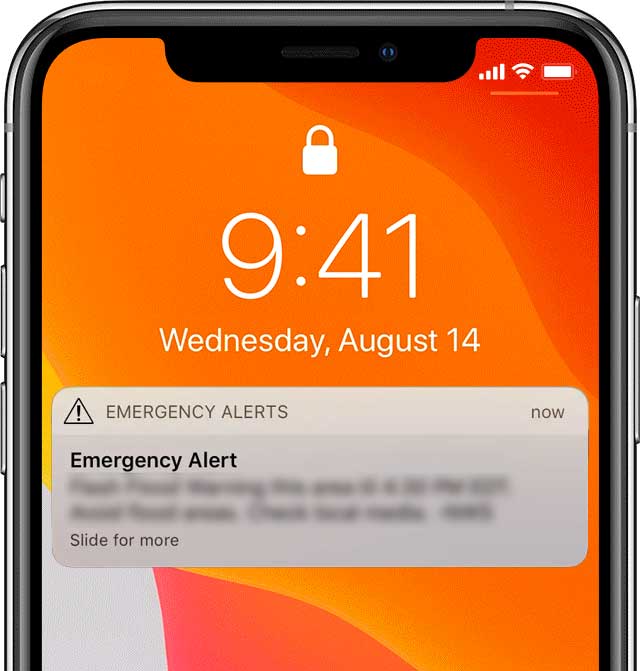
Wireless emergency alerts
They look like text messages but are designed to emit a unique, loud sound, plus a different pattern of vibration on your smartphone. The alerts will include the type and time of the alert with the action you are expected to take.
Make sure your phone is ready to receive them by checking your user manual for “Government Alerts” or “Emergency Alert Messages” and checking with your wireless service provider that your phone is enabled and equipped to receive them.

Emergency alert system
A national public warning system sent through radio (AM/FM and satellite) as well as TV stations (local, cable, and satellite).

NOAA Weather Radio All Hazards
A nationwide network of radio stations that offers weather information for your area, 24 hours a day, 7 days a week.
National Weather Service severe weather alerts
The Weather Enterprise Resources program offers members of the public the option to sign up for text alerts, phone call alerts, and email alerts if and when severe weather is imminent.
Reverse 911
This service is a public alert used to alert individuals and businesses of dangerous conditions by sending a recorded voice message to landline telephones and registered cellphones within a specific area.
Like the 911 service, this is managed by local jurisdictions. Contact your local police department non-emergency number or your telephone service provider to ensure your phone number is added to the service.
Step 2: Ensure enough water, food, and supplies
Agent Jessica Arledge, who works with 76% more single-family homes than the average Savannah agent, jokingly refers to this part of preparedness as a “Zombie Apocalypse kit” — but it really refers to a way of staying prepared for hurricanes and other natural disasters that might trigger a home emergency evacuation.
The Federal Emergency Management Agency recommends access to an easy-to-transport emergency supply kit that provides you with at least a 72-hour supply of the following items:
- One gallon of water, per person, per day, for drinking and washing
- A three-day supply of non-perishable, easy-to-access food per person
- A battery-powered or hand-crank radio, and a NOAA Weather Radio with tone alert — and extra batteries for both
- A flashlight with extra batteries
- Chargers for your cell phones
- A first aid kit
- Whistle to signal for help
- Dust masks to help filter contaminated air, plus plastic sheeting and duct tape
- Moist towelettes, garbage bags, and plastic ties
- Wrenches or pliers to turn off utilities
- A can opener if your food is in cans
- Local maps
- Prescription medication and glasses
- Infant formula and diapers
- Pet food and extra water for your pet
- Important family documents like insurance policies, identification documents, and bank account records
- Cash and change
- Sleeping bag or warm blanket — one per person
- Complete change of clothing for everyone in the house
- Household chlorine bleach and a medicine dropper
- A fire extinguisher
- Waterproof matches
- Feminine supplies and personal hygiene items
- Paper cups, paper plates, and plastic utensils
- Paper and pencil
- Books, games, or puzzles for children
Step 3: Protect yourself and your family
Arranging for alerts and getting your “go bag” ready are just the first part of the plan. Next, you have to put together all the other components. Here’s how to get started.
Before the emergency
Get your insurance in order
As part of your home emergency evacuation plan, make sure you review your homeowners insurance policy and determine if you’re properly covered — including any recent remodel projects.
After consulting the hazard map in the first step, you might want to discuss specific disaster coverage with your insurance agent. As a rule of thumb, you may have to add catastrophe insurance riders that protect your home against earthquakes, floods, and hurricanes, or human-made disasters like terrorist attacks to your regular policy.
For example, a named storm deductible will be higher than a regular deductible. When it comes to flooding, insurance companies can be persnickety. Standard homeowners insurance does not include flood coverage or damage from floods, which might leave thousands of homeowners in the Texas arctic blast out of luck for their broken pipe claims.
Inventory your belongings
Also important? Making sure the contents of your home are properly inventoried.
An insurance claim for damage will require a detailed list of the items included in your home and their estimated replacement value. Apps like Home Contents or Sortly can help you with that task.
Take pictures or a video of all the rooms inside your home, your valuable items, and receipts (if you have them) to provide proof of value.
Secure precious items
Identify any irreplaceable, sentimental small items that can be easily transported in your vehicle in case of an emergency evacuation.
Manage your documents
Make sure your personal identification and important documents are ready to travel in a waterproof, sealed container.
Important documents to consider having ready to go include:
- Copies of driver’s licenses and passports
- Social Security cards
- Birth certificates
- Marriage certificates
- Adoption and citizenship papers
- Military records
- Medical records
- Property titles
- Bank account numbers
- Wills
- Life insurance documents
Will your house benefit from lights?
Consider installing solar-powered outdoor lights so your home can be seen in low-visibility conditions.
Back up your files
Before your power goes out, or you lose your internet connection, make sure your important files are backed up to the cloud using a service like Google Drive or Dropbox.
Keep your car ready
Create a habit of keeping your gas tank at least half-full at all times. In an emergency, or during mandatory evacuation orders, gas may become scarce, expensive, or controlled by the government, and you won’t get far without at least half a tank.
Learn about your house
Become acquainted with your home’s utility mains, and learn how to connect and disconnect them in case of a home emergency.
Include anyone who can’t help themselves
Your plan should address the needs and care of pets, family members with special needs, and other members of the family that need extra help moving — like seniors.
If you’re staying home
There’s a difference between staying at home and sheltering in place; make sure you understand the nuances of each of those levels of emergency status.
You might need to stay inside during a short period of time — like a tornado warning — or a significantly longer one in the case of a pandemic like we saw with the coronavirus, which still allowed us to leave the house for essential services like grocery shopping or the pharmacy. Not every extended emergency will be nearly as forgiving!
Plan for extended periods of blackouts by having new spare batteries for essential items. And consider purchasing an electrical generator or another power backup that allows you to run some of your appliances.
Discuss and identify safe places to shelter inside the home in the case of tornadoes.
Stock up on activities that don’t require power or the internet to keep you entertained, like books, puzzles, or board games.
If you’re evacuating your home due to an emergency
If possible, eat, give away, or throw away any perishable food out of your fridge; this includes the freezer. It will prevent you from coming back to the smell of decaying food and a potentially ruined fridge.
If possible, you should also bring in or secure outside furniture or appliances, such as grills and trampolines.
Next, try to make sure you:
- Turn off the oven, stove top, and any appliances
- Turn off all the lights inside your home
- Disconnect and close all the utility mains
- Drain your pipes, if you have time
- Close all your windows, exterior doors, and garage doors
- If you are evacuating, leaving your doors and windows closed but unlocked, as well as a note saying you’ve evacuated the premises, will help the work of any first responders who might need to confirm you’re not in the home anymore
Follow all the directions of any public officials, including preferred evacuation routes, speed limits, and other considerations. You want to make sure you’re not becoming an additional burden in a situation that is already complicated.

Step 4: Communicate with your family and community
As a family, you’ll need to discuss where you will go in the event of an emergency that forces you to leave your home.
Choose at least three different spots: one close to home, one outside your neighborhood, and one outside of town entirely. Map out the different routes to all of those locations. Make sure everyone knows under which circumstances they are to meet at which location.
Understand the different ways to evacuate your home. “It’s important to have a central meeting place right outside the home, in case of fire or earthquake, and in case the normal exit is blocked by fire, smoke, or debris,” says Arledge.
Designate an out-of-state in-case-of-emergency contact and make sure everyone in the family has a copy of their information. Share this information with your emergency contact so they are prepared to act in case of an emergency.
At this point, you should be ready to create a master plan, type it out, and ensure everyone in your family understands what the plan entails. This includes making sure your children understand what they have to do if they are in school at the time of an emergency, and where you will be in order to be reunited with them.
All family members, including children, should memorize their full names, address, and phone number. This template from the Red Cross can be a helpful starting point.
Create a master contact list with the most important phone numbers and addresses of family members, friends, and neighbors, as well as doctors, insurance companies, and lawyers.
Print out route maps, and reconsider direct and alternate routes in case of disruption of main arterials. It’s always a smart idea to keep maps in your car so you can refer to them.
Keep a set of master plans, master contact lists and route maps for every member of the family. If you use a family password organizer, such as 1Password, for about $60 per year, you can store all of your emergency documentation there so that everyone has access to it, but it remains secure and encrypted.
Step 5: Involve your community and practice just in case
Now that your plan is ready, you can make a physical checklist of all the things you need to do before, during, and after evacuating your home in case of emergency.
Every six months or so, run an evacuation drill with your entire family. After the drill, identify any issues with your evacuation plan, frequently forgotten items, or things that are taking a long time to accomplish, and adjust them accordingly.
Shoot for a 10-minute evacuation goal to get everyone out of the house and safely into the sidewalk across the street.
Do you have a home maintenance plan? Add an item to your quarterly list: Check your emergency kits and replace anything that requires it.
Think you could do even more to help in an emergency? Consider training as a Community Emergency Response Team volunteer. This certification helps you prepare for hazards in your area, teaches you how to prepare, and gives you more confidence in how to act in the middle of an emergency.
For other community volunteer opportunities in case of emergency, you can read about the Citizen Corps here. Happy prepping!
Header Image Source: (FabrikaSimf / Shutterstock)
