4 DIY Driveway Ideas for an Entrance You’ll Love Cruising Into
- Published on
- 6 min read
-
 Alesandra Dubin, Contributing AuthorClose
Alesandra Dubin Contributing Author
Alesandra Dubin, Contributing AuthorClose
Alesandra Dubin Contributing AuthorAlesandra Dubin is a lifestyle journalist and content marketing writer based in Los Angeles. Her vertical specialties include real estate; travel; health and wellness; meetings and events; and parenting. Her work has appeared in Business Insider, Good Housekeeping, TODAY, E!, Parents, and countless other outlets. She holds a master's degree in journalism from NYU.
-
Sam Dadofalza, Associate EditorClose
Sam Dadofalza Associate Editor
Sam Dadofalza is an associate editor at HomeLight, where she crafts insightful stories to guide homebuyers and sellers through the intricacies of real estate transactions. She has previously contributed to digital marketing firms and online business publications, honing her skills in creating engaging and informative content.
You might say that the driveway is the unsung hero of a home. Its functionality is undeniable — you drive in and out of this swath of material every day. It plays a major role in curb appeal, providing a wow-worthy first impression that sets the stage for arrival. And, perhaps best of all, a quality driveway can increase your home’s value.
A Quick (And Free) Way to Check Your Home Value
Get a preliminary home value estimate in as little as two minutes. Our tool uses information from multiple sources to give you a range of value based on current market trends.
Ready to give your driveway some TLC? You can upgrade your driveway with an easy DIY home improvement project in a single weekend (or even a single day!).
Options range from simple, affordable projects to more technical improvements that require a large investment. We’ll detail four DIY driveway options so you can determine which project is best for your home and skill level.
So read on, roll up your sleeves, and get to work! Once you wrap the job, you’ll cruise into your beautiful new DIY driveway every day with pride.
Pressure-wash driveway restoration
Budget: $100-$500
Project duration: 2 hours
Difficulty level: Easy
Project overview:
This is the DIY driveway overhaul for a beginner on a budget. No, you won’t get an all-new driveway out of the effort — but you’ll get a sparkling new look in just a couple of hours for a few hundred dollars (or even less if you already have a pressure washer or opt to rent one instead of buying).
“I’ve worked in the pressure washing industry for a long time, and you’d be amazed at some of the driveway transformations I’ve seen,” explains California-based pressure washing expert Cory Paul of Pressurist.
“Pressure washing is an easy enough project for even the most inexperienced DIYers, and it’s certainly the cheapest, yet it can have an equally major impact on curb appeal as redoing the driveway from scratch.”
Instructions:
- Clear everything off the driveway.
- Sweep the surface with a broom or leaf blower.
- Apply a cleaning solution (see recommendations below).
- Pressure wash the surface at a pressure suitable for your driveway material.
- Let the driveway dry, and you’re good to go! Or finish with a sealer for an added layer of protection.
Worried you could damage your property as a newbie? Don’t be. “Many people ask if a pressure washer will cause any damage,” Paul says. “The answer is no in most cases because driveway materials are tough. But as a precaution, always keep the nozzle 6 to 12 inches from the surface.”
What you need to know:
- This DIY project is the easiest, most affordable way to revamp a driveway.
- Look for local pressure washer rentals to spend even less (or invest in the purchase, and use it every couple of years for a refresh).
- You need decently high pressure (3,000 PSI) to clean most driveways.
- Your cleaning solution has a significant impact on the final results. Use a product that’s made for the conditions you’re working with, such as oil stains or moss.
Get started with:
- Zep Driveway, Masonry, and Concrete Cleaner and Degreaser, about $60 for a case of four at Amazon
- Westinghouse Outdoor Power Equipment 3200 PSI Gas-Powered Pressure Washer, about $349 at Amazon
- SWOPT Premium Rough Surface Deck Brush, about $17 at Amazon
Gravel driveway
Budget: $500-$3,500
Project duration: 10 hours
Difficulty level: Intermediate
Project overview:
A gravel driveway is a feasible DIY project for home improvers with intermediate skill level. The materials are inexpensive, plus you can tailor the look to suit your home style. An attractive feature for homeowners, gravel driveways make for low-maintenance solutions.
Instructions:
- Stake out the driveway’s path, clearing away grass and dirt.
- Measure the space you’ve created to calculate the cubic yardage of gravel you’ll need to fill it (so multiply the width by length by depth).
- Buy and spread your gravel, compacting layers as you go. Michael Hayworth of Apex Concrete and Hauling suggests packing four to six inches on the base, followed by one to two inches for the final layer of material.
“If you’re going to do a gravel driveway, the best practice is to grade out the land while keeping drainage in mind,” Hayworth says. “Try to work with the flow of the current landscape so the water is directed away from your house or building.”
What you need to know:
- This is an intermediate-level DIY project that you can complete in a weekend — or even in a single long day.
- “Outline your driveway with either a string line or paint beforehand so you can stay within the desired dimensions,” Hayworth recommends.
Get started with:
- Brown pea gravel, about $100 per 10 cubic feet at Lowe’s
- Greenes brown wood landscape edging, about $10 per 1.25 feet at Lowe’s
Paving stone driveway
Budget: $6,000 to $18,000
Project duration: 1 to 2 days
Difficulty level: Intermediate-advanced
Project overview:
A paver driveway adds beauty and texture to your curb appeal. “Despite its clean, crisp look, it is relatively easy to install as long as you have the right tools, patience, and work ethic,” explains contractor Aaron Donovan of AD Services.
To get started, you’ll need a broom, string line and pegs, shovel, spirit level, tape measure, a wheelbarrow, mallet, and some screed rails. Now, gather your driveway materials: sub-base aggregate, sand, and the paving stones of your choice, whether natural stone, brick, or concrete.
Instructions:
- “Before beginning to lay your slabs, measure out your area with string and pegs,” Donovan says.
- Dig down about six inches and incorporate a slope where the land is flat to allow surface water to run off naturally.
- Place your restraints — either curbs or edging stones.
- Add a sub-base of at least four inches, ensuring it is well-compacted for a stable foundation.
- Apply your layer of damp, sharp sand and smooth it to the finished level.
- Lay your blocks, which should initially reach about a half-inch above the desired level, before compacting.
- Lastly, sweep sand into the joints and compact the surface using a plate compactor, available to rent or buy. “Make sure every joint is adequately filled,” Donovan says.
What you need to know:
- Paving stones make for durable, polished-looking driveways.
- This project is for intermediate to advanced DIYers.
- “Make sure you measure your driveway carefully and leave some room for wastage paving slabs,” Donovan says.
Get started with:
- Pavestone concrete paver, $0.67 each at Home Depot
- Pavestone paver sand, about $6 per .5 cubic feet at Home Depot
- Jackson 6 cubic foot steel wheelbarrow, $149 at Home Depot

Concrete driveway
Budget: $2,700-$9,700
Project duration: 1 to 2 days
Difficulty level: Advanced
Project overview:
Installing a DIY concrete driveway requires some know-how and a larger budget, but the results are well worth the effort. A brand-new concrete driveway is highly durable and adds major value to your home.
This is an advanced-level project for DIYers with experience, patience, and the willingness to plan carefully. Hayworth advises homeowners to hire a local company for pouring.
“The best practice is to grade out the land for your subgrade,” Hayworth explains, noting that the finished driveway elevation should be four inches above the subgrade. “Keep drainage in mind, as well.” He also suggests that you grade the land a bit wider during this process as a way to give yourself room to work along the margins.
Instructions:
- Outline your driveway with either a string line or paint beforehand so you can stay within the desired dimensions.
- Install form boards (typically 1-by-4-inch pieces of wood) using your string line.
- Use metal or wood stakes to secure them for when the concrete is poured. “These stakes will keep the pressure from displacing or knocking over the boards,” Hayworth explains.
- Measure and calculate the amount of concrete you’ll need for your driveway and contract a local company to pour the final layer.
- Broom this top layer and edge the sides as needed. (Edging concrete creates neat, rounded edges that finish the look and help minimize chipping when dry.)
What you need to know:
- This is an advanced project and a larger investment.
- “Timing is everything,” Hayworth says. Unless you’re truly a concrete expert, he advises DIYers to consult with a contractor to determine when the concrete is set enough to begin the finishing process.
- A well-constructed and well-maintained concrete driveway can last 20 to 30 years.
Get started with:
- 250-foot string line with reel, about $7 at Home Depot
- Bon Tool concrete edger, about $20 at Home Depot
- 24-inch concrete broom, about $26 at Home Depot
Upgrading Your Home? First, See How Much It's Worth
HomeLight can provide a preliminary estimate of home value in as little as two minutes.
Planning and budgeting for your driveway renovation
As you take note of the tips and best practices mentioned above, make sure to plan your renovation project carefully and set a realistic budget. Proper preparation will save you time, money, and frustration down the road. Here’s how to get started:
- Measure the area: Measure the length and width of your driveway to estimate how much material you’ll need. This will help you avoid overspending or running out of supplies mid-project.
- Set a budget: Decide how much you’re willing to spend on the project, including materials, tools, and any potential professional help. Remember, costs can vary based on the type of material (e.g., gravel, asphalt, or pavers).
- Choose materials: Do some research to compare the cost and durability of different materials.
- Factor in labor costs: If you decide to contact a local company for some tasks, such as pouring concrete, consider the cost of hiring them.
- Plan for unexpected expenses: Always set aside 10-15% of your budget for unexpected costs, such as additional materials or repairs that arise during the process.
With a solid plan and a clear budget, your DIY driveway project will be a smooth ride from start to finish.
Drive up your home’s value
A DIY driveway renovation is an excellent upgrade that can seriously boost curb appeal and increase your home’s value. More importantly, a beautiful, well-maintained driveway can make a huge difference when it’s time to sell your home. It makes for a good first impression: when potential buyers pull up, a stylish driveway immediately gives off a welcoming vibe.
Whether you’ve chosen classic stone paving or a modern design, your hard work will pay off in the end. So, don’t underestimate the power of a great driveway. It’s the “drive” that could steer buyers right to your door.
As you plan home upgrades and improvements, connect with a top-rated real estate agent for expert insights on preparing your home for sale.
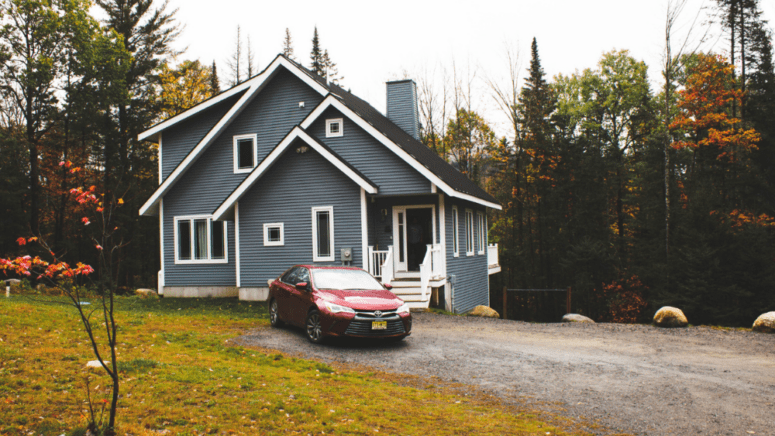
Header Image Source: (Aditya Vyas / Unsplash)
At HomeLight, our vision is a world where every real estate transaction is simple, certain, and satisfying. Therefore, we promote strict editorial integrity in each of our posts.