
6 DIY Home Improvement Ideas for When You’re Gearing up to Sell
- Published on
- 4 min read
-
 Katelin Hill Contributing AuthorClose
Katelin Hill Contributing Author
Katelin Hill Contributing AuthorClose
Katelin Hill Contributing AuthorKatelin Hill is a freelance writer who channels her passion for home and garden into educational and aspirational stories and how-to's. Before writing for HomeLight, Katelin spent almost four years working in editorial at This Old House magazine. She has since written for Bob Vila, The Family Handyman, and multiple local news outlets.
Between Pinterest, Instagram, YouTube, and “Do It Yourself” websites galore — there’s no shortage of DIY home improvement ideas out there these days. Should you shiplap your walls? Create a vertical garden? Add some of that lovely crown molding to the ceilings? The possibilities are endless!
“There are truly so many changes you can make yourself,” says Tabitha Kontur, a top-selling real estate agent based in Huntsville, Alabama.
The trick is to stay within your own comfort level, which is something homeowners struggle with as they turn inspiration to execution. In fact, a study of 2,000 homeowners by home improvement resource ImproveNet showed that 63% of people had regrets about at least one DIY home improvement project they attempted. Plus, as you get the house ready to sell, you’ll need to focus on what’s going to make the biggest impact on your home’s marketability.
When in doubt, start with this list of beginner-level projects which also make a great impression with buyers.
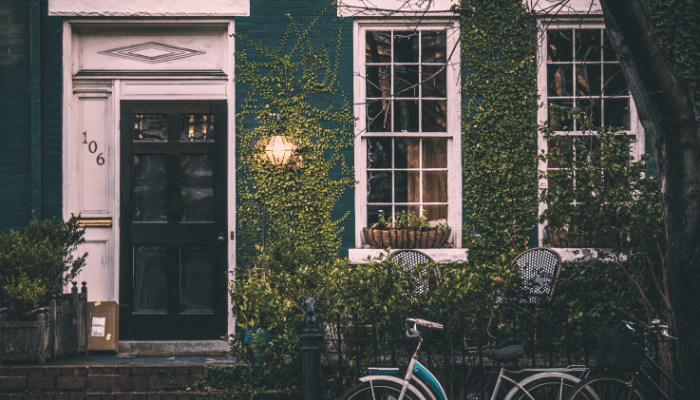
1. Spray paint your front door black
More than 70% of top agents agree: paint that front door before your house goes on the market. To make the job easier on the DIYer, Kontur suggests using spray paint. “You’ll get the most even coverage without brush strokes,” she said.
However, spray paint can be a bit limited in the color department. To keep it simple, go with a classic black or dark gray. One analysis of property listings showed that homes with black front doors sell for $6,000 more on average. (If you go with another color, be sure to pick a color scheme that’s either monochromatic, analogous, contrasting, or complementary using the color wheel.)
Also, make sure you don’t go with the cheapest spray paint at the store. Rustoleum and Krylon are safe bets, but the “ColorPlace” brand from Walmart gets bad reviews for its spotty coverage.
Once you’ve got your color locked in, hold off on tackling this project until you have a clear sunny day to work outside. (You definitely don’t want to be inhaling those spray paint fumes indoors!) Start early, so you can apply two coats of paint and allow plenty of time to dry between each before hanging the door back up.
To remove the door hinges, wedge a flat-top screwdriver between the hinges and the top of the hinge pins, then lightly tap the handle of the screwdriver with a hammer to push the hinge pins up and out. Remove the rest of the hardware, like the doorknob, with a screwdriver.
Lay the door on a sheet on the grass (or prop it up on a pair of sawhorses if you have them handy) and prep the door. Doors in good condition — that is, those that don’t have chipping or peeling paint — can be lightly sanded with a 180 or 220 grit sandpaper, according to The Family Handyman.
This will rough up the surface enough to help the paint stick. For doors with peeling paint, start with 120 or 150 grit (a coarser type of sandpaper that strips the finish better) and work your way up to a higher grit to smooth the surface out.
Wipe down the door with a household degreaser before painting, and dry the door with a towel. Then, spray on a coat of primer formulated for your door’s material — the can will indicate if it’s a good choice for metal or wood. When the primer dries, spray on at least two coats of your final color. Refer to the manufacturer for their recommended drying time in between coats.
2. Plant a colorful flower bed in your front yard
Of the 435 agents surveyed for HomeLight’s Top Agent Insights Q2 2019 Report, more than 67% said that planting colorful flowers was a worthwhile curb appeal project that can add value to your home. In fact, 75% of agents agree that well-landscaped homes are worth anywhere from 1% to 10% more than homes without landscaping.
In other words, for a home worth the median U.S. value of $342,200, landscaping could add between $3,500 and $34,000 in value. So in addition to your typical lawn-care routine, you might find creating a brand-new flower bed worthwhile for just a day’s work and a few supplies.
- Pick a spot that gets full sun, if possible, which will give you the most options when it comes to choosing plants. Before beginning any digging project, call 811 to check for underground utilities.
- Hit up your local nursery or home center. Select colorful flowers that require the same amount of sun that your flower bed location can offer.
- Choose a mix of annuals and perennials native to your particular region for the best results. Don’t forget to pick up a $12 soil test kit to check the pH balance of your soil (you may find you need to amend your soil if it is too acidic or neutral) and a couple of bags of $4 mulch, depending on the size of your garden bed.
- Once you’re ready to begin planting, Better Homes and Gardens recommends marking the border of your bed with white flour from the kitchen. Use a shovel to dig up the grass and till the soil to prepare it. Test the soil’s pH with your kit and amend it as the results recommend, if necessary.
- After preparing the soil, dig a trench 4-6 inches deep around the bed; Fine Gardening recommends digging in at a 90 degree angle for the cleanest look.
- Plant your flowers according to their labels (taller plants typically look best in the back, and shorter ones up front) before topping them off with a coat of fresh mulch.
3. Refresh dated light fixtures — again, with spray paint!
If your light fixtures are dating your home, give them a makeover with spray paint, says Debra Gould, an internationally recognized home staging expert and creator of the Staging Diva Home Staging Business Training Program.
She suggests a matte black or nickel color. Once you’ve removed your fixture from the ceiling, tape off any glass, light bulb bases, or cords you don’t want painted. Spray first with a coat of rust-prohibiting primer ($5), then apply your final color. Let dry — check your manufacturer’s directions for the minimum recommended drying time — and recoat if needed.
For rusted fixtures that need a facelift — like exterior lights — use sandpaper to lightly remove the rust with sandpaper, then clean off any dust (a pack of $3 tack cloths makes easy work of this).
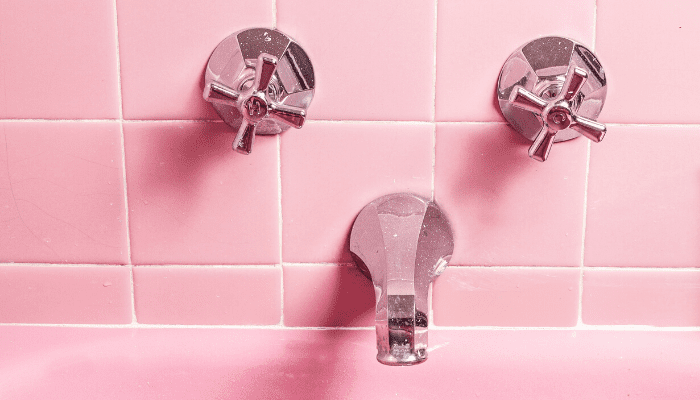
4. Touch up your caulk around the tub
You already know to clean your bathroom before putting your home up for sale, but there’s one often-overlooked detail that can make the space look like new. Over time, the caulk — the waterproof filler used to seal the gaps between the tub and tile or wall — becomes prone to mildew, mold, and cracking.
If yours is looking brittle or dingy, Gould suggests taking care of it before listing the house.
It’s a simple process that requires just a $3 tube of mold and mildew-resistant latex caulk and a $16 caulking gun.
- First, remove the existing caulk carefully with a utility knife. If you have difficulty removing the old stuff, Bob Vila recommends loosening it up either with a blast of heat from a hairdryer or by applying a caulk softener, available at home centers for around $8.
- When you have a clean, dry surface, use painters tape to outline the area where you’ll be applying the caulk. This will help you achieve a clean line.
- Using your caulk gun, slowly and carefully apply a new bead of caulk. Wipe any excess caulk with a towel as you go; smooth out the remaining caulk with a moistened finger. Then, pull the tape off while the caulking is still wet.
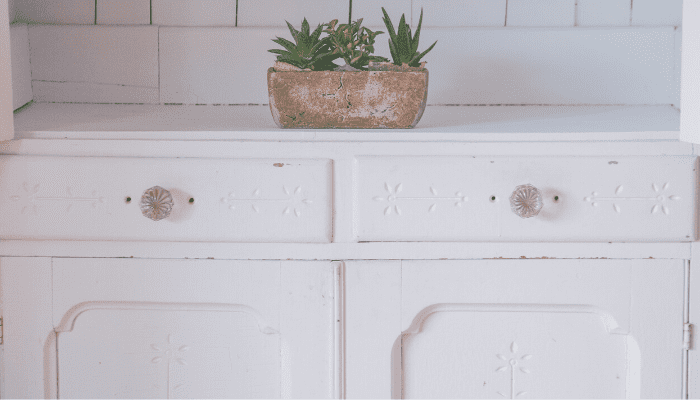
5. Get some new hardware for the kitchen
“If your kitchen cabinets are dated and you don’t want to go to the expense of painting them, something that will really bring them back to life is just to replace the hardware,” said Kontur. In fact, you can carry this into the bathrooms as well to create continuity. All you need is a screwdriver.
You can buy knobs and pulls individually, but you can often get a better deal buying a larger “contractor” pack that can be found for as low as $20.
One tip for making sure you get the right fit: When replacing pulls, which require two screw holes, you want to measure the distance between the center of each hole to get the “center-to-center” measurement.
You’ll use that measurement to select the proper size for your new cabinet pulls — so if your center-to-center measurement is 3”, you’ll want to see that designation on the package, which can differ from the total width of the pull.
6. Swap out your switch plates around the house
Think about what happens to your light switches over time: they get dingy, yellowed, and dated. It’s something that happens so slowly you might not notice, but a buyer will.
“If you have really old switches, someone is likely to think the wiring is old,” Gould said. Replace your switch plates (and electrical outlet covers, while you’re at it) with something a bit more upscale to make your home — wiring and all — look well-maintained. Switch plates start at about $3 to $5 per plate, but may cost more depending on how many switches they cover.
To swap out your plates, simply unscrew the two screws for every one switch (there’s typically one screw both above and below the switch). Make a statement with oil-rubbed bronze, go for cottage-style with beadboard, or just upgrade yours with a classic, refined white option.
You don’t have to replace the switches themselves, just give them a good cleaning. Good Housekeeping offers up some good advice for how to do it safely: apply a bit of rubbing alcohol to a Q-tip (not the switch itself) to get into the grooves without making a mess.
Just a few small projects make a big impact
With some basic supplies and a little sweat equity, you’ve done what is seemingly impossible: given your home a fresh face without making a single call to a contractor. There’s still work to be done, so now’s the time to find a top agent in your area who can help take you over the finish line.
Header Image Source: (Kelly Sikkema / Unsplash)
At HomeLight, our vision is a world where every real estate transaction is simple, certain, and satisfying. Therefore, we promote strict editorial integrity in each of our posts.