How to Remodel Stairs from Carpet to Wood for a Grand Improvement
- Published on
- 5-6 min read
-
 Dorothy O'Donnell Contributing AuthorClose
Dorothy O'Donnell Contributing Author
Dorothy O'Donnell Contributing AuthorClose
Dorothy O'Donnell Contributing AuthorDorothy O’Donnell is a writer based in San Francisco. She covers lifestyle, travel, real estate and other topics for publications such as the Los Angeles Times and 7x7.
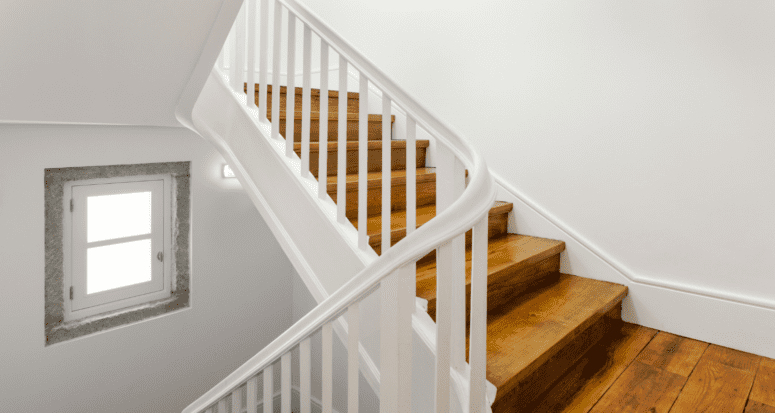
A home’s staircase is like the expressway from one floor to another, enduring daily traffic and wear-and-tear. Carpeted stairs not only can appear out-of-date but will start to lose their fluffiness from frequent use while collecting dirt, dust, and grime. Those of us with carpeted stairs are all too familiar with the recurring stains and dents on multiple steps that may become difficult or impossible to remove over time.
Since stairs are often centrally located or close to the front entrance, a staircase renovation can dramatically increase the appeal of your home and provide an instant upgrade. This guide on how to remodel stairs from carpet to the ever-desirable wood covers the main steps to complete this project yourself, with tips for working with a contractor if the project falls outside of your handiness comfort zone.
Cost of converting carpeted stairs to wood
If you hire someone to perform the work, you’ll pay between $100-$200 per stair, reports HomeAdvisor. The cost to redo 10 to 12 carpeted steps ranges between $1,080 to $2,700, including carpet removal. DIYers can complete the project in under $500, depending on the design of your staircase, number of stairs, and the type of wood used.
Anatomy of a staircase
Your DIY project checklist
Please note that the following steps are tailored specifically to homeowners replacing carpeted stairs with new wood ones. The process is a little different than refinishing existing hardwood stairs hidden under carpet.
1. Order your stair treads and risers
Once you’ve decided on the look you want for your new stairs, order your treads and risers. A tread is the part of the stair you step on; a riser is the piece it’s attached to.
Make sure you order retrofit treads. They’re specially designed for easy installation over carpet treads. You’ll want quality hardwood for your treads. But unless your risers must match them, they don’t need to be made out of the same wood. Cheaper paint-grade wood, such as poplar, will suffice.
Pre-stained treads will save you time and elbow grease, but you’ll pay for the convenience. An unfinished tread from Hardwood Lumber Company starts at $71 while a stained version will set you back $119. And if you’re going with popular white risers for your stairs, you can purchase them pre-painted, too.
Lumber companies and sites like Stair-Treads.com, which specialize in treads and risers, offer a variety of wood and style choices. If you order from them, factor in extra time for delivery. You may pay a bit more, too.
If you’re in a hurry and just want basic, budget-friendly options, head to your local home improvement store. There’s a good chance you’ll be able to drive off with your stair pieces or pick them up in a day or two.
2. Gather your supplies
After you’ve acquired treads and risers, collect the additional tools, materials, and protective gear needed to complete your stair remodel.
Tools
- foam brush
- circular saw
- nail gun
- pliers
- pry bar
- orbital sander
- table saw
- tape measure
- utility knife
Materials
- construction tape
- construction adhesive
- lint-free rag
- nails
- sandpaper
- stain
- sealer
- vacuum
Protective gear
- mask/respirator
- sturdy work gloves
- plastic gloves
- safety goggles
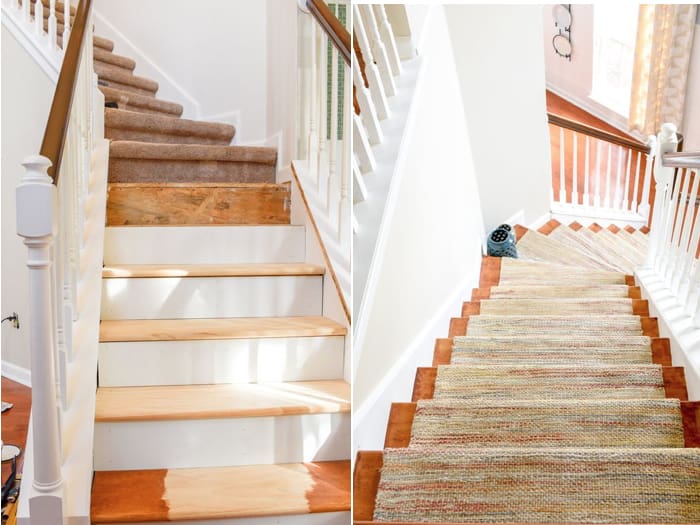
3. Remove carpet and padding
Grab your pry bar, utility knife , pliers and work gloves. This is dusty work, so be sure to mask up, too. Then head to your top stair, slip on your gloves and let the ripping begin.
Slice into the carpet, starting in the back corner of the tread and continuing across it. Reach under a corner of the carpet and pull it across the tread to dislodge it. Repeat the process as you work your way down the stairs.
Remove padding in the same fashion. It’s usually attached with staples—lots of them! Pull them out with your pliers. Then use pliers and a pry bar to dislodge the tack strips that attached the carpet to the subfloor.
Vacuum away dust, dirt and carpet scraps.
4. Prep and cut
Before installing your retrofit treads, remove the noses from your existing treads. The nose, also known as a bullnose, overhangs the edge of a tread by about an inch. You’ll need to saw off all noses so the retro treads will fit. Measure the width of the overhang on each tread, then draw a line to mark the area you’ll cut with your circular saw.
Measure your existing treads. Then measure and cut your new treads to size with your saw. Since each stair may vary slightly in size, be sure to keep track of which tread goes with which stair. Pro tip from YouTube home improvement channel Cedarly: Write the number of the coordinating stair on the bottom of each new tread. Follow the same process for your risers.
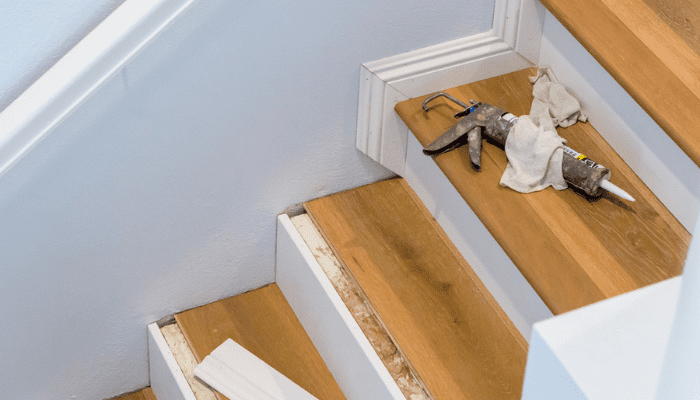
5. Attach your treads and risers
Starting at the bottom of your stairs, attach your first riser to the subfloor with construction adhesive. Then adhere your first tread. Work your way up the stairs, alternating risers and treads. This technique ensures each tread will sit flush against the riser.
6. Stain your new stairs
Follow these steps to complete the staining stage of this project:
Prep your stair pieces
Unfinished treads are sanded by the manufacturer. But you’ll want to give them another polish before applying stain to ensure a smooth finish.
Go over the top of the tread and the edges with fine grit sandpaper (120-220) by hand or with a small sander. (Check out these recommendations from House and Garden for the best sanders for stairs.)
If your risers are the same wood as your treads, repeat the process on them. Sweep or vacuum all sawdust before moving on to staining.
Apply pre-conditioner, stain and seal
Home improvement bloggers like Diane Henkler advise using a pre-stain conditioner to avoid unsightly blotches. Let it dry for 15 minutes, then begin staining your stairs.
Use a foam brush to apply your stain and a lint-free cloth to blot excess. (Wear gloves to prevent staining your hands.)
Be diligent about cleaning dust as you go— specks can easily settle into damp stain and mar your hard work. Once the stain dries, protect it with two coats of polyurethane. If your risers will match your treads, repeat the process on them.
Block off your stairs
Typically, you should wait at least 24-hours before walking on your beautiful new stairs. Block access with a pet or baby gate. For added protection from dust and dirt, consider sealing off the area with a plastic barrier like one of the options available from Zipwall.
When to hire a professional
If you’re not up for redoing your carpeted stairs yourself, or your job is too involved, turn to a pro. Even when you put the job in someone else’s hands, you’ll still have to don your project manager hat. Here’s a rundown of key tasks you’ll need to plan for — and issues that could throw a wrench in the process:
Choose the right kind of contractor
For a simple stair renovation that just requires removing carpet and installing new treads and risers, hire a flooring professional or experienced handyman. For bigger endeavors, like stairways that need to be reconfigured, have odd-shaped steps or railings, you’ll want someone who specializes in stairs.
“If there’s a railing system, you can’t just put down hardwood around it,” says Michael Lonsdale, a general contractor in the San Francisco Bay Area. “The railing has to come out because it goes through the floor.”
To find a stair specialist, check the Stairbuilders and Manufacturers Organization’s website. In addition, you may want to consult an architect if your stair remodel involves an extensive re-design and structural changes.
Finalize your design choices
Do you love the polished, traditional look of clean white risers paired with rich espresso-hued treads? Or are you going for something more casual, like an oak staircase stained with a warm honey gold? Narrow down your ideas and review them with your contractor.
“It’s best to have magazine examples to show your stair guy exactly what you want,” says Lonsdale. “Then you can figure out if it can be done and how much it will cost.”
Once you have a clear vision for your stairs, coordinate with your contractor to order your hardwood and other necessary materials.
Watch out for timeline busters
The time to complete a stair renovation varies dramatically depending on the scope of the project, materials and other issues. A professional can usually finish a basic wall-to-wall stairway in a few days. Jobs involving more complex work, such as changing the layout of a staircase or replacing the subfloor, can take weeks or months.
“After the carpet’s torn up, a contractor will assess the soundness of the subfloor stairs to make sure they can support the new stairs,” says Lonsdale. “Especially in older houses, the subfloor might need to be repaired or replaced.”
Your contractor will also walk up and down the stairs to check for squeaks. If needed, he’ll add screws to the subfloor framing to eliminate them.
“Stairs are one place you really don’t want squeaks,” Lonsdale notes.
The type of wood you choose for your stairs can also affect your timeline. If you opt for unfinished pieces, your contractor will need extra time to sand and stain them.
Deal with tricky details
Stair companies often farm out certain parts of a job, like designing custom railings, to skilled craftspeople. This type of work demands meticulous attention to detail, so you’ll want to monitor it closely to prevent mistakes that could cost you time and money.
Kim T., a California resident, discovered this when she hired a stair company to remodel her curved, carpeted staircase with wood. The project included a new railing. Unfortunately, the artisan who designed it was off in his measurements.
“The curvature of the railing was way off, so it had to be ripped out and redone,” she says.
To keep your stair renovation from going off the rails, don’t hesitate to ask contractors to double-check crucial measurements. And speak up whenever you have questions or concerns.
Prepare for access issues
Find out if you’ll be grounded for some or all of your stair renovation. Kim and her family had periods of limited access to their second floor during their three-month project.
“We’d have to stay off the stairs for a couple of weeks at a time and then there would be a week or so where we could go up and down,” she explains.
If you can’t get to upstairs bedrooms, store clothes and other essentials downstairs and figure out sleeping arrangements. If you have kids, put a fun spin on the inconvenience by setting up a tent outdoors — weather permitting — or throwing a living room campout. Facing an extended period of disruption? Consider a staycation at a local hotel.
Make sure your stairs are safe
Stair safety is no laughing matter. Each year, stairway accidents result in thousands of injuries and deaths. It’s essential for your contractor to ensure your stairs comply with safety codes and that he acquires the proper permits.
According to Londsdale, if a contractor is just redoing the surface of your stairs and keeping the same layout, you don’t need a permit. It’s a different story when railings are involved.
“Railings are a big safety issue, so they have to meet code for things like being graspable, spacing and height,” he says. “Any railing should be permitted and inspected.”
Header Image Source: (Diana Rui / Shutterstock)
At HomeLight, our vision is a world where every real estate transaction is simple, certain, and satisfying. Therefore, we promote strict editorial integrity in each of our posts.
