
How to Fill Large Gaps in Wood Trim: 7-Step Repair Guide
- Published on
- 4 min read
-
 Melissa Rudy Contributing AuthorClose
Melissa Rudy Contributing Author
Melissa Rudy Contributing AuthorClose
Melissa Rudy Contributing AuthorMelissa Rudy is a seasoned digital journalist with 15 years of experience writing web copy, blog posts and articles for a broad range of companies. When she can’t buy or sell homes, she settles for the next-best thing: researching and writing about all things real estate-related.
There’s no denying the charm of wood trim. Crown molding, baseboards, window and door frames, mantels, and other millwork can add warmth, character, and definition to any space.
But like any home improvement, precision is key.
If there are gaps between where the connecting pieces of wood trim come together — such as between the baseboards and the floor, where the wood trim meets the walls, or the inside corners of window frames or baseboards — it can result in a sloppy, unfinished look.
Connect with a Top Agent
Top agents sell homes faster and for more money than average agents. In addition, their experience can help identify issues that may need to be addressed prior to an appraisal.
Whether you installed the trim yourself or inherited it when purchasing an older home, you don’t have to learn to live with unsightly gaps, nor do you have to remove the trim and start over.

Why fill in the gaps?
The main purpose of wood trim is to add a polished, finished look to the room, and a large gap will detract from that goal by drawing the eye to that glaring imperfection. “Why put in all of that hard work and not take care of this final small detail?” posits Craig Russell, founder and CEO of an award-winning building company in Cincinnati, Ohio.
If you plan to put your home on the market soon, filling trim gaps should definitely have a spot on your pre-listing checklist. It may seem like a small detail, but discerning buyers will notice the issue during showings and inspections. And if you’ll be painting your wood trim, you’ll need to fill the gaps beforehand to ensure a smooth, even finish.
Beyond looking sloppy, large gaps in wood trim can cause more serious issues. Eric Regan, owner of Mission Painting & Home Improvements, warns that if the problem isn’t corrected, water can seep through and penetrate the wood behind the gaps, which will eventually cause it to rot. It can also provide an entry point for bugs and can allow hot or cold air to escape, forcing your HVAC system to have to work harder to regulate the indoor temperature.
Now that you know why it’s so important to fix large gaps in wood trim, what’s the best way to tackle it? If you’re short on time and have the budget for outsourcing the job, you can always hire a company or a handyman. But if you enjoy dabbling in DIY projects and have a good amount of time and patience, you can get rid of those gaps yourself in seven relatively simple steps.
Step 1: Gather the tools of the trade
Before getting started, make sure you have all of the essentials you’ll need to complete the job:
- Tube of acrylic latex caulk with silicone
- Caulking gun
- Painter’s tape
- Scissors
- Long, thin nail or similar piercing tool
- Bowl or cup of warm water
- Rag or small hand towels
Step 2: Prepare the caulk tube
Before you begin, use a pair of scissors to cut the tip of the caulk tube at a 45-degree angle. Matt Kunz, president of Five Star Painting, a Neighborly company, says to make about a ⅛ inch cut as close as possible to the end of the nozzle, as this will create a smaller opening for a more precise application.
Next, use a long nail or piercing tool to puncture the seal of the caulk tube. (Some caulking guns will come with their own piercing tool.)
Step 3: Load the caulk gun
Load the tube into the caulk gun by placing it slowly along the slot and gently squeezing the trigger.
Step 4: Apply painter’s tape
To minimize clean-up, you can opt to place painter’s tape on either side of the gap before applying the caulk.
Step 5: Add pre-filler (for large gaps)
If the gap is large enough that caulk alone may not fill it, Russell sometimes will use wood putty, an automotive filler called Bondo, or expanding foam sealant to fill the gap before caulking. If the gap is wider than ¼” or deeper than ½”, this type of backing material will improve the look and performance of the caulking job.
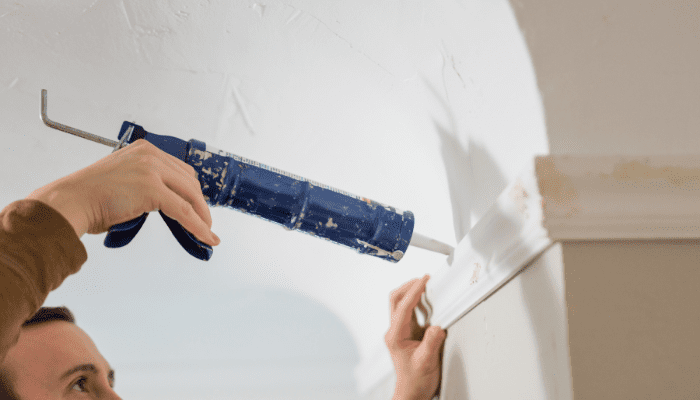
Step 6: Fill the gap with caulk
If this is your first time working with caulk, it’s a good idea to first practice on another surface, such as a piece of cardboard or a grocery bag. When you’re ready to move on to the real thing, hold the caulking gun at an angle with the tip of the tube at the top of the trim and apply a small, even bead of caulk along the gap. If you’re filling a long gap, work in smaller four- to six-foot sections.
Step 7: Smooth the caulk bead and wipe away any excess.
Next, wrap a rag or small hand towel around your index finger, then dip it into some warm water. Run your finger along the layer of caulk and gently press to smooth the caulk into the gap. This will help the caulk adhere to the surface and create a neat, clean look.
After smoothing the bead, clean off any excess caulk on either side of the gap before it dries. If you used painter’s tape, remove the tape right away before the caulk dries.

How long does the caulking process take?
A six-foot section of an interior baseboard takes two minutes or less to caulk, and a six-foot section of exterior soffit takes five minutes or less. “It’s well worth the time invested to prevent headaches that will come months or years down the line if it’s not addressed properly,” Regan says.
Most caulk will feel dry to the touch within 30 to 60 minutes, but it takes around 24 hours for it to fully “cure” before painting.
Sell Your Home As-Is With a Cash Offer
HomeLight’s Simple Sale platform connects sellers with cash offers. Clients don’t have to worry about additional repairs, prepping their home for listing, or showing their home.
Common mistakes when filling in wood trim gaps
While the process of using caulk to fill gaps in wood trim may seem simple and straightforward, there are some common missteps that could impact the end result:
- Not applying enough caulk: According to Regan, skimping on the caulk will leave some space unfilled and won’t solve the original issue.
- Applying too much caulk: If an excess of caulk is used, the area will appear rough and unfinished. “There is a “Goldilocks” happy medium that you want to achieve,” Regan notes.
- Cutting the caulk tube incorrectly. Cut the tip of the caulk tube at an angle near the top to give you more control over how much is dispensed. If you cut the tip toward the bottom, it could create too wide of an opening for application.
- Trying to caulk continuously across a too-long stretch of trim. If you have to caulk the entire length of a wall, Family Handyman suggests starting by caulking the six inches on either edge and then working toward the middle in the four- to six-foot increments.
- Rushing it. “Rushing can compromise the quality of your bead of caulk,” warns Russell. “Take your time. A good, steady hand is your best tool.”
With the right tools, some practice, and plenty of patience, you can say goodbye to those unsightly gaps in your wood trim and achieve a professional-looking result.
Header Image Source: (Elisa H / Unsplash)
At HomeLight, our vision is a world where every real estate transaction is simple, certain, and satisfying. Therefore, we promote strict editorial integrity in each of our posts.