How to Stage Every Room Like a Showplace for Your Listing Photoshoot
- Published on
- 10 mins read
-
 Christine Bartsch, Contributing AuthorClose
Christine Bartsch Contributing Author
Christine Bartsch, Contributing AuthorClose
Christine Bartsch Contributing AuthorFormer art and design instructor Christine Bartsch holds an MFA in creative writing from Spalding University. Launching her writing career in 2007, Christine has crafted interior design content for companies including USA Today and Houzz.
-
Jedda Fernandez, Associate EditorClose
Jedda Fernandez Associate Editor
Jedda Fernandez is an associate editor for HomeLight's Resource Centers with more than five years of editorial experience in the real estate industry.
A picture is worth a thousand words, or in the world of real estate, thousands of dollars.
“The quality of your listing photos can increase the number of showings you get,” explains Dalton Carroll, a top-selling agent in Arlington, Texas from the Lionheart Real Estate Group. “You have a better chance of getting your best offer from a pool of 20 excited buyers, versus 5 buyers who are just hoping your house will work for them.”
Buyers are attracted to high-quality photos, which makes them more likely to want to see your house in person even if other listing details (such as the size, location, or number of bedrooms) aren’t a perfect match. In fact, 41% of buyers report that photos are the most valuable content on a website — making them an integral part of the home purchasing process.
However, there’s only so much a pro photographer can do to make your home look good if you haven’t taken time to stage your home before the photo shoot. That’s where you, as a homeowner, need to take the initiative to do the prep work. We’ve put together this room-by-room guide to help you get every space of the house ready for its close-up.
Find a Top Agent Who Can Market Your Home for Top Dollar
Our data shows that the top 5% of real estate agents across the U.S. sell homes for as much as 10% more than the average real estate agent.
Pre-staging prep to help your home shine in listing photos
In our survey of top-selling agents, 38% said sellers should take staging as an additional step to sell their homes amid persistent high rates.
So, first things first, you need to scrub down your house until its every nook and cranny is as clean as possible — from those spiderwebs in your ceiling corners to the dust bunnies clinging on your baseboards.
Next, declutter every surface in every room, including toiletries in the bathroom, and throw pillows on your couch or bed.
“The most important step to staging your house for listing photos is decluttering,” says Carroll. “Find staging examples that make sense for your home — like simplifying every room.”
Don’t assume you can just tuck your stuff away when the photographer arrives. It’ll take longer than you think, which means you’ll be paying a pro by the hour to wait while you straighten up.
While you’re at it, take time to depersonalize your home, too. While you don’t need to remove every single family photo, keep those personal images to a minimum. Hide any private information, too, like bills and bank statements.
Once you’ve transformed your cozy home back into a blank slate, it’s time to transform each room into a photo-worthy showplace.
Room-by-room staging tips to get your whole home photo-ready
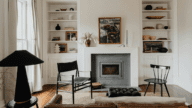
When you get right down to it, most modern homes are just a series of blank, boring boxes with little items inside to capture a buyer’s attention. If your rooms don’t have an eye-catching feature like crown molding or a fireplace, it all comes down to staging to show off your home’s potential.
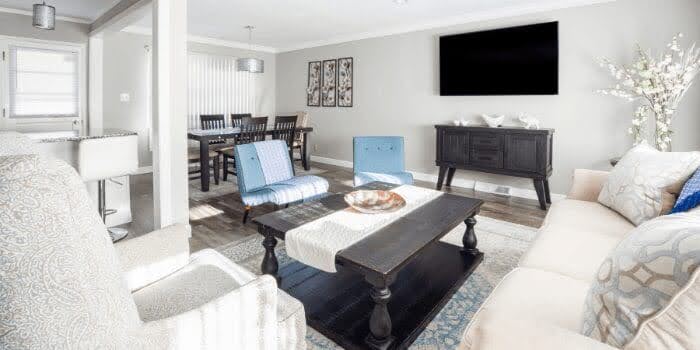
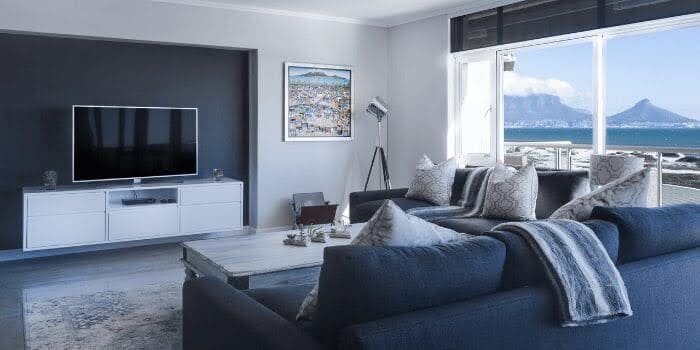
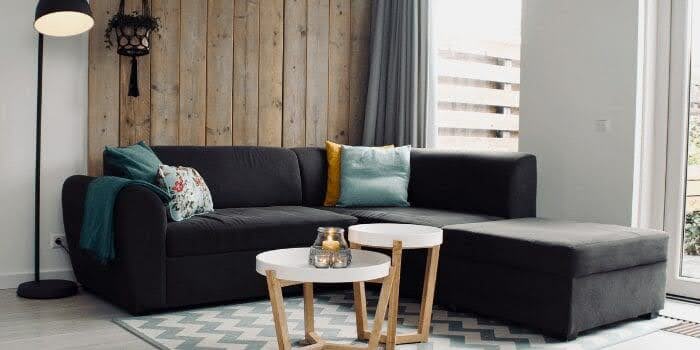
In the living room:
If your couch has a crazy pattern or a too-vivid color that’ll distract in the photographs, tone it down with a fitted slipcover. Base your slipcover color selection on the living room wall color.
Neutral hues like taupes and creams are typically your best bet if you’ve gone for a darker wall color like gray. For white or cream walls, you’ll need a smoky gray, midnight blue, or even charcoal black slipcovers to anchor the space.
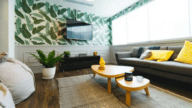
When it comes to your listing images, there is such a thing as too much neutral. Colorful and textured throw pillows keep the whole look from becoming too bland to photograph.
Your coffee table, end tables, and mantel (if you have one) shouldn’t be cluttered, but they shouldn’t be empty either, or the room will look barren and sterile.
You can find the right balance between too much and not enough using vignettes:
- Stick with an odd number of items (one big vase, three picture frames, five candlesticks)
- Vary size, weight, and texture (pair a tall, heavy wrought iron table lamp, a medium-sized clear glass jar filled with delicate seashells; and a low driftwood candle holder
- Create cohesion with a cute — not kitschy — theme (think farmhouse-inspired galvanized steel tray, burlap-bound books, and a vintage, enameled pitcher of flowers, not a ’70s-inspired rattan, macramé, and disco ball display)

In the bedrooms:
Like the couch in your living room, the bed in your master or guest rooms are a focal point. For smaller bedrooms decorated for kids and teens, it’s fine to keep colorful bedspreads and décor as long as the rooms are neat and clean.
For the primary — and any set up as guest rooms — you’re going for a soft, serene look that promises a soothing night’s sleep. A comforter with a bold color or busy pattern is nowhere near restful, so pick up a solid, neutral duvet cover if your current bedding overwhelms the space.
Then, apply the 60-30-10 design rule to your accent bedding.
This is a rule of percentages, with one neutral hue making up 60% of the color in a space. When you’re applying this rule to the bed, this 60% hue is typically the bedspread.
Then you add 30% of a secondary color that complements the first neutral — like a pale blue pillowcase to compliment a cool, white comforter; or a darker taupe pillowcase to complement a warmer, cream-colored comforter.
At 10%, the third accent color is where you can have a little fun, adding pops of color, texture, or pattern that contrast the other two hues.
For example, on that crisp, white bed with pale blue sheets, a pair of black and silver-patterned throw pillows draw the eye to the bed, transforming it into the star of the room both in photos and for showings.
If you’re uncertain about your bedroom design style, texture options, or color palette choices, simply search out images of professionally-designed bedrooms online and do your best to mimic those style choices.
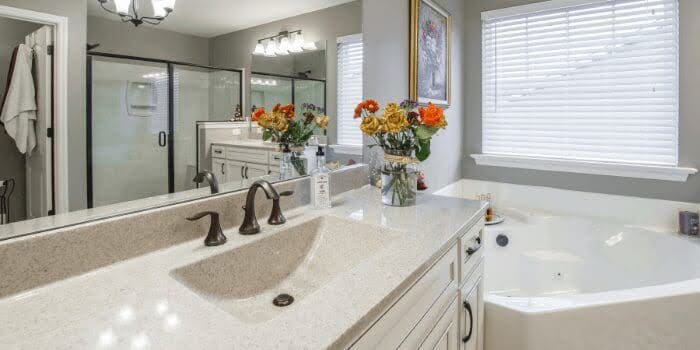
In the bathroom(s):
Unlike most of the blank boxes that make up your house, there’s lots to look at in the bathroom. The sink, shower/tub, and toilet all compete for attention, and not always in a good way.
All three need to be scrubbed pristine clean, and if there are any water stains on the faucets, shower head, toilet handle, or even the light fixture, you’ll need to replace them before your photoshoot.
As some of the smallest spaces in your house, less is more when you’re staging your bathrooms. So remove almost everything from the countertops, and take the seat cover off your toilet, which only draws attention to the least attractive element in the photos.
You’ll also need to pull out all rugs and bathmats before the photo shoot (and before any showings). Rugs cover up most of the existing flooring, making the space look smaller than it actually is, and hints that you’re hiding damage.
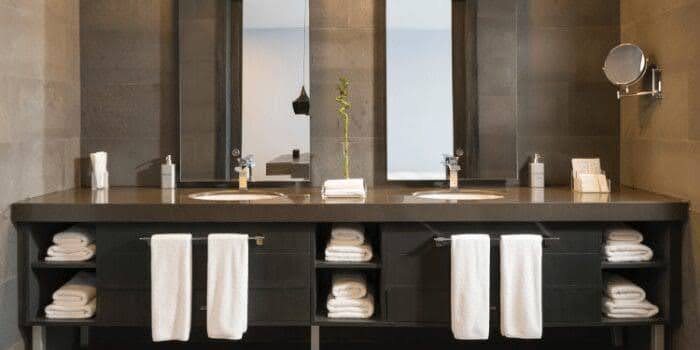
Losing the softening element of rugs in a small space with so many hard surfaces can make bathrooms look sterile and uninviting. Counteract that by introducing a few softer textiles that create a high-end spa vibe.
Add an eye-catcher to your cleared bathroom sink area with the softer texture of a bamboo soap dispenser and the quintessential stack of three spa-rolled towels.
While a lid cover draws the eye to the toilet in a negative way, you can dress up the barren tank with a low or no-light plant that can survive in a dark bathroom, like a bamboo plant.
The biggest focal point in the room is your shower/tub area. If you’ve got one with a glass door, keep it clean with a shower squeegee applied with the proper technique. However, if yours needs a shower curtain, you have an opportunity to play with color and texture.
If your bathrooms are a sea of sterile white, create a high-end spa ambiance and add a pop of color with an aqua shower curtain. For bathrooms that already have color on the walls, bring in a subtly-textured, crisp white shower curtain to add brightness back into the space.
Just steer clear of shower curtains with kitschy imagery, such as this curtain that is literally a spa photo. Also, stay away from curtains with a busy pattern or an overwhelming design style, like this romantic ruffled curtain.
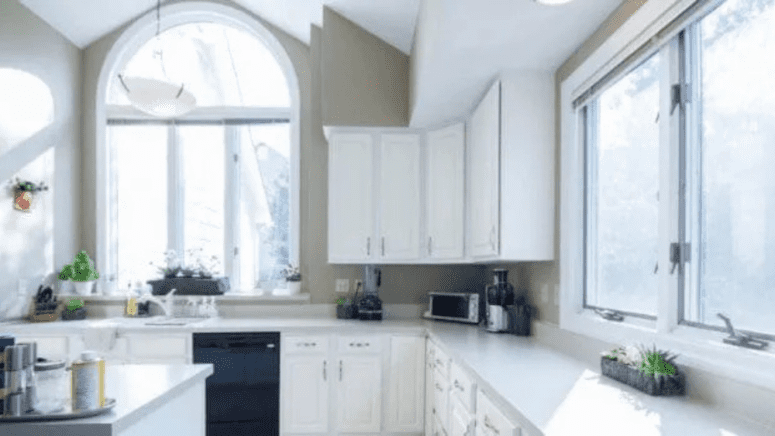
In the kitchen:
The countertop is premium real estate in the kitchen, so stage your kitchen to show off every available inch. Remove everyday essentials like your coffee maker, microwave, and that jar of utensils by your stovetop.
The only things that should be on your counters for the photo shoot are a few well-placed décor items — so the kitchen doesn’t look too stark and empty.
While the kitchen is a functional space, the décor items for your photos don’t need to be as practical as a knife block. Instead, select items for the aesthetic they’ll bring into the room.
For example, you can warm up a crisp white kitchen with a clear glass bowl filled with vibrant yellow lemons or mirror the country vibe of your farmhouse sink with a vignette of antique stoneware crocks filled with an assortment of vintage rolling pins.
However, pretty can be practical, too, so don’t be afraid to display your decorative yet functional spice rack or incorporate your collection of elegant cruets into a countertop vignette.
No countertop décor can draw attention away from dated cabinets. Luckily, you can update the look of your cabinetry with an easy, inexpensive fix: by installing new cabinet hardware.
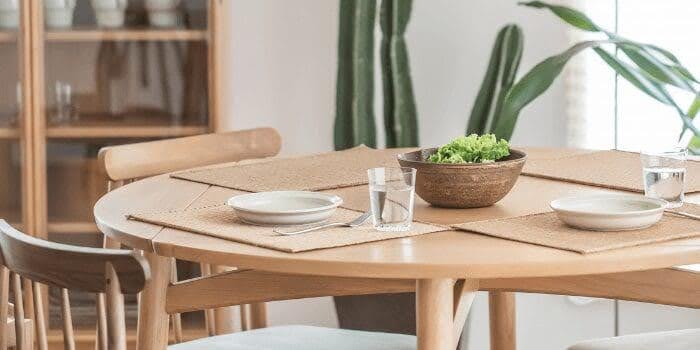
In the dining room:
If you’re lucky enough to have a formal dining room, don’t try to disguise it as a bonus room. Show the space off by staging your dining room in a way that highlights its intended purpose.
For starters, bring in a table and chairs that match the design style and scale of the dining room. If your own set is beat up, outdated, too small for the room, or nonexistent, it may be worth renting a dining set.
While a table and chairs are essential to giving the room purpose, you don’t need to go overboard by setting out place settings. A simple tablescape is all you need to keep the table from looking bare.
For the photos, you can get away with a few candlesticks and a vase of fresh-cut flowers. But if you’d rather create a tablescape that will last you through the open house and all the showings, opt for a centerpiece that won’t need frequent replacing.
When you’re not setting the table for supper, your tabletop options open wide. So feel free to go for options that might be a tad impractical during an actual dinner party.
For example, go for a minimalist aesthetic with a row of votive candleholders running the length of the table, or get creative with Mother Nature by making a terrarium centerpiece.

Is your home photo-ready?
“Listing photographs are the most important thing always because buyers these days get their first impression of your home online,” says Carroll. “Your listing photos need to set expectations for potential buyers and get them excited to see your house in person.”
The only way to know if your staging efforts are good enough to photograph is to take a few test shots yourself and share them with your agent.
Together, you’ll work out which spaces are on point and which ones still need work so that every room in your home is ready for its closeup when the professional photographer arrives.
Source: (Milly Eaton/ Pexels)
At HomeLight, our vision is a world where every real estate transaction is simple, certain, and satisfying. Therefore, we promote strict editorial integrity in each of our posts.