So, the Seller Didn’t Complete Repairs Before Closing. Now What?!
- Published on
- 4 min read
-
 Lira Samanta Contributing AuthorClose
Lira Samanta Contributing Author
Lira Samanta Contributing AuthorClose
Lira Samanta Contributing AuthorLira Samanta is a freelance writer specializing in creative writing, personal motivation, and technology topics. She spends a lot of her spare time curating her Airbnb wishlist and dreaming about building her own She Shed. Using her economics and data science chops to study trends in real estate prices, she is always excited to find a great deal.
After all the work you’ve put into finding a home, closing on it is supposed to be a celebration. However, nothing will rain on your parade as hard as the house not actually being ready on closing day because the seller did not complete repairs before closing that they agreed to handle.
Imagine walking into your soon-to-be home with air conditioning that isn’t working, broken outlets, or other repairs that are incomplete despite the seller saying they’d take care of it. Incomplete repairs during your final walkthrough add a lot of stress, but we interviewed a real estate expert to put together this comprehensive guide on handling this scenario if it does come up.
Top agents bring experience to the entire home selling process, including when negotiations get difficult. What’s more, they can help sell your home faster and for more money.![]()
Work With Top Agent to Navigate Your Home Sale

Step 1: Assess where you are in the process
If you’ve already closed on the house, depending on the extent of the incomplete repairs, you will need to speak to a real estate attorney about your options for recouping some of your financial losses from the seller.
This may involve filing a claim against the seller in court, which will require documented evidence. Most people don’t love spending their time and money in court, so this should be considered a measure of last resort.
If you haven’t closed yet, then you have many more options for proceeding (or not) with the sale.
Step 2: Talk to your agent
If your agent isn’t there with you during the final walkthrough, contact them right away. Your agent will then get in touch with the listing agent to inform them there’s a big problem.
“Communication is key, and being professional throughout the entire contract process comes into play at this moment,” says Ryan Kutter, a top Texas agent with 16 years of experience, who’s worked with 75% more single family homes than the average agent in Conroe, Texas.
By this point in your journey, your agent should have established enough rapport with the seller’s agent such that the contractor can be called back out and enlisted in finding an appropriate solution.
If closing hasn’t happened yet, do not close on the house! You have more options for moving forward if you haven’t already closed.
A top agent will work hard to facilitate a good solution in order to protect you.

Step 3: Assess your options
Before closing, you may have access to one or more options if the seller hasn’t yet completed the repairs.
1. Postpone the closing
Does the seller have money to complete the repairs, but doesn’t quite have the time? In this case, “the recommendation to the buyer would be to push closing out because obviously the buyer’s leveraged position would be to not close on it yet,” says Kutter.
“A seller’s motivation is to make it right, typically. If things are major enough, we’d push back closing to the next day or even the next week.”
Consider pushing back the closing date, depending on your own moving timeline.
You may need to put furniture in storage and rent another temporary place while you wait for the new closing date. Calculate the added expenses so you can factor these into your negotiations with the seller.
2. Have the seller pay in advance
“From a buyer’s perspective. If they’re okay with it, a lot of times we’ll get money instead of that repair,” says Kutter.
“If you don’t want to delay closing — for example, if you have movers showing up in 30 minutes — then you can ask for a dollar amount.”
If the seller is able to pay any contractors who are needed to complete the repairs, be sure to talk to the contractor yourself so you can be sure they are covering all needed repairs as well as that the seller’s payment amount will be sufficient.
3. Get a closing credit
If you have a good estimate for the repair cost, the seller may be open to giving you a credit for that same amount at closing.
Make sure you get this concession agreed upon in writing so that the correct amount is credited to your share of settlement costs when you close.
4. Pay a lower price
If the seller is not willing to give you a closing credit amounting to the cost of the repairs, you can simply ask that the price of the home be reduced to accommodate the repair costs.
In fact, to the seller, a price reduction can be preferable to a closing credit because it reduces their selling fee, a percentage of the sale price. When you know that this option may be more attractive to the seller, you can use it to your advantage!
5. Consider escrow funds
Finally, if the seller isn’t able to afford the repair cost, ask if they can transfer some of their proceeds from the sale to an escrow account to cover 1.5 times the repair cost estimate. You can arrange to receive these funds at closing to cover the repairs.
Step 4: Have your agent negotiate with the listing agent
After assessing your possible paths forward, your agent can present the listing agent with the options you’re willing to consider.
Kutter says, “Nobody likes last-minute surprises. Nobody loves delays.” The listing agent will also be motivated to find a resolution as quickly as possible so that the closing can occur, with happy parties on both sides.
Step 5: Get another inspection
After all these steps, getting another inspection may make you want to tear your hair out, but it’s worth it to ensure that the property is in good shape before you finally close!
Talk to your agent about the possibility of the seller paying for a second inspection, which typically can be handled by the same inspector for a reduced price.
“Sometimes, repairs are visual, and other times, they’re mechanical. We rely on receipts for proof for repair,” says Kutter. So make sure you take a good look at the receipts from the contractors who completed the repairs to ensure everything is up to your expectations.
Step 6: Close or walk away
After weeks of negotiation (or more), the seller will likely be that much more motivated to close. But do not close on the house if the repairs aren’t complete, or if you don’t have the funds to fix them in an escrow account, no matter what the seller promises you!
If they are unable or unwilling to complete the repairs, pay for them to be done, or budge on the price, it’s probably best for you to cut your losses and start fresh elsewhere.
Prevention is better than cure
This is not a position anybody wants to be in. Know that the best way to avoid this scenario is to prevent it in the first place.
Kutter notes: “9 times out of 10, everything is good. But if a seller doesn’t complete repairs before closing, it’s usually because the paperwork for repairs wasn’t specific enough.”
It’s best to build in a buffer such that all remaining repairs are completed, and proof of completed work is provided to you no later than three days prior to closing. This gives you time to assess whether the repairs meet your standards.
A top agent will continually check in on the repairs to get you updates in the weeks leading up to the closing.
HomeLight can connect you with the most experienced buyer’s agents in your home shopping area. These top professionals can help you make the best buying decisions and protect your interests.![]()
Achieve Greater Buyer Confidence With a Top Agent
Why use a top agent to buy a house?
The best agents can not only help you handle surprises, but will work diligently to make sure you’re out ahead of any potential challenges. Knowing what to watch out for only comes from experience, so make sure that you’re working with a professional who knows how to overcome these types of challenges when they do come up.
Find a top agent with HomeLight to help you in your home buying journey.
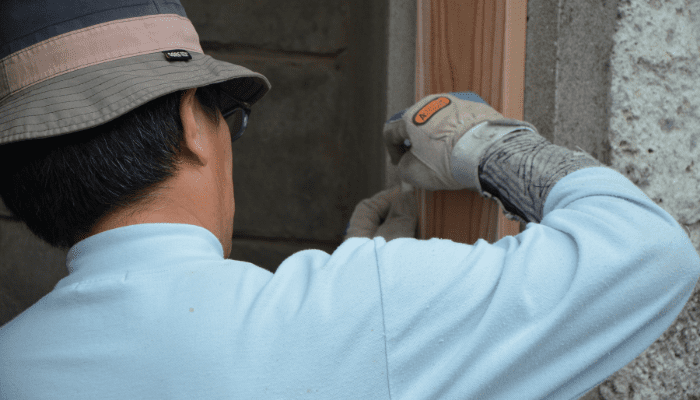
Header Image Source: (Erik Mclean / Unsplash)
At HomeLight, our vision is a world where every real estate transaction is simple, certain, and satisfying. Therefore, we promote strict editorial integrity in each of our posts.