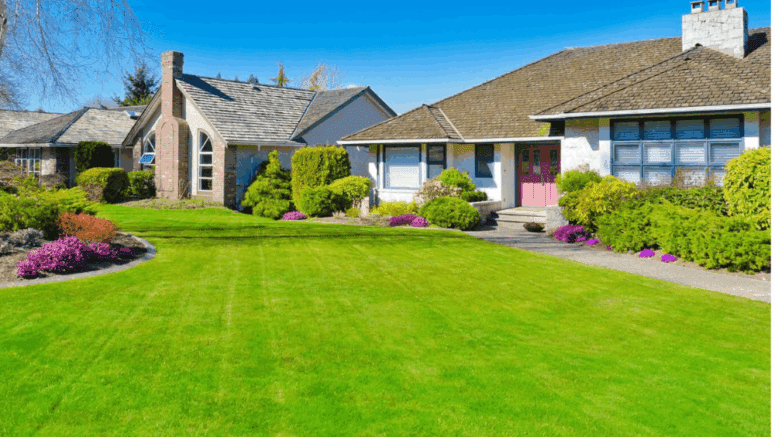
18 DIY Front Yard Curb Appeal Tips for an Enviable Lawn
- Published on
- 15 min read
-
 Whitney McKinnon, Contributing AuthorClose
Whitney McKinnon Contributing Author
Whitney McKinnon, Contributing AuthorClose
Whitney McKinnon Contributing AuthorWhitney McKinnon is a professional writer whose work has recently appeared on Yahoo, SlickText.com, HelloGiggles, Bolde, and The Hoth.
-
 Jedda Fernandez, Associate EditorClose
Jedda Fernandez Associate Editor
Jedda Fernandez, Associate EditorClose
Jedda Fernandez Associate EditorJedda Fernandez is an associate editor for HomeLight's Resource Centers with more than five years of editorial experience in the real estate industry.
Your curb appeal to-do list keeps growing. Swap out old welcome mats, get bright and shiny house numbers, freshen up the mailbox. All good ideas for selling your home! But don’t forget…
Americans obsess over one thing: bright green, perfectly manicured lawns (much to environmentalists’ dismay).
According to a study of 2,000 homeowners, 76% feel like they have to be competitive with their neighbors for curb appeal, while the average person would spend $122 per month for upkeep, which includes lawn care. Every neighborhood has its secret rivalries and judgments. Joe across the street hasn’t mowed the lawn in a week and a half — how dare he!
What’s more, a study by HomeLight in 2024 found that 48% of agents consider improved curb appeal, and outdoor and garden spaces as the strongest selling point in the current market.
While these curb appeal tips are great for enjoying your own home, they also can help boost buyer interest if you’re selling. Working with a top agent can help identify the best ways to prep, stage, and market your home for a successful sale.![]()
Selling Your Home Soon?
“Front yards are the first thing people see when they pull up to the front of the house,” says top-selling Houston real estate agent and single-family home expert Timothy Sojka. “It’s your advertising, it’s your billboard, it’s everything.”
Roll up your sleeves, grab some compost bags, and let’s get started on Project Make Your Lawn Look Amazing!

Start with the cleanup
1. Clear out leaves and debris from the lawn, decks, and flower beds.
Mature trees can be a huge selling point for your property, but you don’t want to remind buyers of how much work they create. As far as yard cleanup goes, your biggest project (and a natural starting point) is to deal with any scattered leaves and debris that make your yard look like a mess.
Depending on the season, you could be in for an endless cycle: gather, scoop, bag…gather, scoop, bag, until your body hates you. Yard cleanup is back-breaking work.
Thankfully, it can be made easier if you have the right equipment and tools. Some of this you might already have at home (as a homeowner, you’re no stranger to lawn maintenance).
But if you have to show your house in a pinch, you could be forced to do more than you’re used to on a condensed timeline. Make sure you’ve got these items on hand so you can work efficiently:
- Long garden gloves
Have a few spares around in case you’re able to recruit helpers or your first pair ends up getting dirty. Best if you can get thorn-resistant (like these professional pruning gloves from Amazon) to protect your hands from any project.
- Cordless leaf blower
Invest in a leaf blower and you’ll cut back on time spent manually raking. It’s also great for clearing off decks and hard surfaces that you’d otherwise have to sweep. You won’t regret opting for the cordless kind that frees up your mobility.
- Compost bags
Many cities do compost pick-up like they do trash and recycling. Just make sure you get the bags that the city requires you to use (sometimes they have to say “Compost!” etc.), otherwise you’ll end up having to purchase special stickers for pickup. Always overestimate how many bags you’ll need. Better to have extra for next year than to have to make another hardware store trip. If you have to take care of yard waste yourself, invest in some reusable garden waste bags for easy transport.
- Leaf scoops
You can only pick up so many leaves with your bare arms. Leaf scoops or hand rakes are brilliant inventions that allow you to gather up bigger piles at once.
- Leaf gulp
Solve the frustrating problem of trying to scoop leaves into a bag that keeps collapsing with a leaf gulp that props it open. It also saves your back because you can sweep in the leaves from the ground rather than having to bend over.


2. Mow your lawn to golf-course level perfection.
When you envision a lush, healthy lawn, you don’t picture something that looks like AstroTurf, but you also don’t want an overgrown eyesore of a yard.
Though ideal measurements vary based on the type of grass in your lawn, you should always be careful not to go too short.
Grass is a plant, and it requires photosynthesis in order to thrive and stay green. Plus, longer grass can help to stave off those annoying weeds by creating a barrier between their seeds and the ground. The general rule, according to experts, is to take a third off the top and leave the rest.
Before you start, make sure your mower’s blades are freshly sharpened and ready to go. Dull blades can result in an uneven lawn or tear out healthy grass.
Then, perform any yearly maintenance on your mower. Replace last year’s oil, fuel, air filter, and spark plugs to get started on a nice, fresh path. You should also take a few moments to lubricate any moving parts on the machine, including wheel bearings, height adjuster, and any other parts indicated by the mower’s manual.
Then, you’ll need to give your lawn a haircut with the right mowing technique.
“Never mow in a square,” advises Sojka. “You want to mow in straight lines, diagonal lines — you want the lines to show.” This will make your lawn look well-manicured and professionally landscaped.
Try this easy diagonal design for an attractive, classic look that boosts your front yard’s curb appeal.
How to mow your lawn in diagonal lines:
- Mow around the perimeter of the yard to create a border.
- Start in one corner of the section you’re mowing (front, back, or side yard), and angle the mower at a 45-degree angle so it’s facing the opposite corner. Mow that path in a straight line.
- Turn the mower around, and make a pass alongside the first line. Make sure there’s about 4-6 inches of overlap between the two lines.
- Mow back and forth, repeating until the entire section is cut.
Since experts advise changing up your mowing patterns to avoid creating ruts in the lawn and uneven wear on your machinery, start from the opposite corner the next time you mow. If your backyard is big, consider investing in a bigger mower – read these garden tractor reviews to better understand your options.
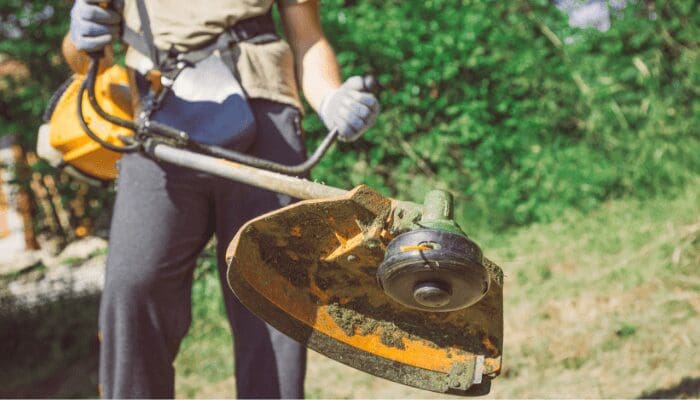
3. Pay extra attention to edges.
Edging your lawn sounds fancy, but it’s actually an easy way to tidy up the look of your front yard.
Edging refers to maintaining the borders of your lawn for a uniform look. The strip of lawn along your walkway, the grass against your raised garden beds, the spot where your yard meets your front steps — these are all areas that can benefit from some type of edging.
There are a few different tools you can use to get the job done. A regular string trimmer can be a quick and effective way to knock down uneven grass and maintain edges, but it might not be the best choice for the more extensive work of creating edges.
In these cases, opt for an edger instead. A rotary edger has blades that roll over and cut grass to create the desired edge. It’s low-tech and can handle smaller jobs with ease.
For an even more effective approach, the higher-powered blades on a gas edger or electric edger will do the trick with little effort.
Not sure where to start? Here’s what you’ll need to do to give your front yard curb appeal with proper edging.
- Mow your space as usual.
- Give your lawn any treatments that might be on the agenda, like weed killer or grass food.
- Select your trimming tool (either an edger or string trimmer).
- Use your tool according to directions to clean up the borders of the yard and any adjacent walkways.
- Clean up any areas surrounding bushes and shrubs.
- Maintain with weekly touchups.
This will keep the edges of your lawn neat and tidy, and can help to stop grass from growing where you don’t want it to sprout.
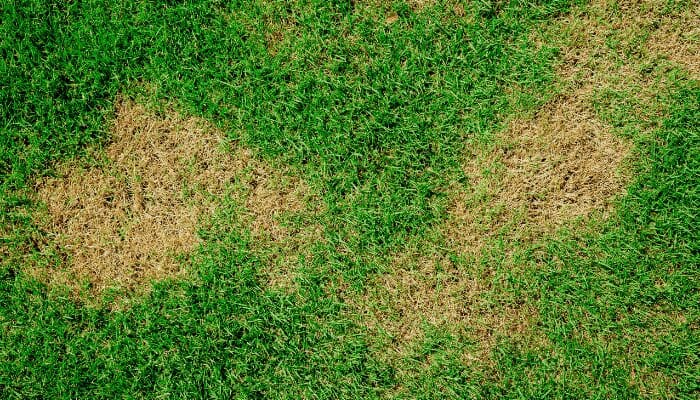
Find out what’s causing unsightly dead spots and treat at the source.
Are some areas of your lawn looking less than lush? Before you treat it, you need to diagnose the issue. Here are some of the common causes of dead areas in an otherwise healthy yard, and what to do about each one.
4. Clear up urine buildup from pets or wildlife.
Spots affected by animal urine will have dehydrated, straw-like grass with an unusually green, well-fertilized ring around the area (due to high levels of nitrogen). Avoid this issue by switching up your regular dog-walking spot or treating the area with water immediately after it’s used.
5. Check for grubs and other bugs.
Grubs are the larvae of some hard-shelled types of beetles. Tug on the dead patch of grass; if it lifts away with little resistance, you might be dealing with a grub infestation. Grubs feed on grass roots, leaving nothing to anchor the grass into the soil. After dealing with the grub issue (beneficial nematodes are a natural way to treat the problem), resod or reseed the area.
6. Treat fungal infestation.
If you notice a thin white web-like substance covering the grass and eventually killing it, you’re likely dealing with a fungal infection like snow mold. Before treating with an antifungal agent, try attacking the issue naturally by making sure your lawn is properly hydrated and fertilized, all dead grass is removed, and your soil is well-aerated.
7. Reseed and remedy chemical burns.
Concentrated spills of chemical solutions like Roundup can result in yellow, dead patches in your lawn. Rake up a small section of this brown grass and look at the roots — if they’re green and healthy, the plant may still be salvageable. If not, you’ll need to rake up the dead grass and reseed the area.
8. Remove hidden rocks.
If you’re noticing that the same spots are turning brown as the weather heats up, do a little digging to see what’s below the surface. Rocks hidden in the soil can heat up when the sun beats down, which can cause grass to burn from the roots up. Dig them up so your lawn doesn’t bake from the inside out.
Once you figure out what’s causing unsightly brown spots in your yard, you can handle it as needed. You’ll be glad you did once you see that lush, green lawn in your listing photos.
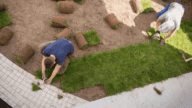

9. Breathe some life back into bare patches.
If your yard has developed a bald spot or two, you’ve got a couple of options at your fingertips to spruce up bare patches in an otherwise healthy lawn.
One option for homeowners is to plant new grass from seed. This can take a few weeks to blend in but can be worth the effort in larger areas, particularly in the early weeks of spring.
Here’s how to plant grass from seed:
- Step 1: Use a rake or garden cultivator to loosen the soil in the bare spot. Add two inches of compost to the spot, if available. Mix in with the rake, and smooth the top.
- Step 2: Sprinkle grass seed over the top. You want a thick layer, but not so thick that the seeds are on top of each other. Use a grass seed that works for your climate.
- Step 3: Rake in the seeds into the top half inch of soil. Use your feet to lightly compact the area.
- Step 4: Water the area once in the morning and once in the evening. Avoid this spot with the mower until growth matches the rest of the ready-to-mow grass surrounding it.
If you don’t want to wait around for new grass to grow, head to your local landscaping supply store and grab a roll of grass sod. It’s a quick and inexpensive way to instantly upgrade patchy spots in your lawn.
Here’s how to patch it up with sod:
- Step 1: Purchase a roll of grass sod that matches the type of grass currently growing in your yard.
- Step 2: Use a hand trowel to cut out a piece slightly larger than the area you need to patch. Lay this patch over the bare area, and trace the ground with the space to match the area to the patch. Dig this area out.
- Step 3: Loosen the soil in the freshly dug area. This will allow roots from the sod patch to more easily attach to the ground.
- Step 4: Place the patch of sod into the hole in the ground. Step on it several times to make sure it attaches fully. Water the area immediately and be sure to keep the spot well moisturized for two weeks.
10. Get rid of weeds.
A yard filled with weeds can make even the most carefully mowed lawn look unkempt.
Don’t let these intruders distract prospective buyers from your property’s beauty. Try this HGTV-endorsed recipe for homemade weed killer to get rid of them before they have the chance to make a bad first impression:
Ingredients:
- 1 gallon white vinegar
- 1 cup of salt
- 1 tablespoon liquid dish soap
How to apply it: Mix ingredients in a spray bottle or watering can. For best results, treat weeds during the sunniest hours of the day.
In this recipe, salt and vinegar combine to create a solution that dehydrates the plant when absorbed through the leaves.
The dish soap allows the surface of the leaves to be more easily penetrable by these weed-killing agents, and you’ll notice that they should start to wither and die within hours.
You’ll want to take a few precautions to avoid harming grass and plants you want to keep. Here are a few ways to make sure you don’t accidentally cross-contaminate:
- Do it when the wind is calm to avoid spreading.
- Rinse watering cans well after using them to spread weed killer. Even better, designate a specific watering container for your weed killer solution.
- Avoid using a high-pressure nozzle, which can create small particles to drift away and affect healthy grass.
- If possible, cover nearby grass with tarps or even cardboard to shield from harmful particles.
- Take care not to step in treated areas, or you might spread weed killer to healthy plants.
Beautify with trimming and adding new plantings
While a vibrant spring display is lovely, true front yard curb appeal shines through every season. Instead of relying on plants that only look good for a few months, strategize for continuous visual interest.
11. Trim hedges and branches.
Hedges and shrubbery can boost your front yard curb appeal if they’re groomed the right way.
One of the biggest mistakes that DIY landscapers make is to over-prune hedges. Use a small pair of pruning shears and keep a light hand wherever possible to avoid creating an over the top, unnatural look. If it doesn’t present an issue (like blocking windows, impeding the walkway, or touching the home), don’t prune for the sake of pruning.
An area to pay special attention to: the greenery surrounding your home. You’ll want to make sure that no plants are touching the house, as this can create a number of issues, including mold, insect infestations, and chipped paint (which home inspectors will notice). As a general rule, keep plants a safe distance of about 12 inches away from the house, and snip any offending leaves or branches.
Speaking of snipping branches, make sure the front view of your home isn’t obstructed by the trees surrounding it. This is especially important when it’s time to photograph the house for listing.
“Seeing the front of the house is one of the most important things in the photos,” says Sojka. “If I see a listing photo where I can just see trees, that doesn’t do me any good. Seeing the front of the house is important, so arboring the trees is important.”
Get some distance between you and your home and look at it from the perspective of a prospective buyer. Are branches or leaves getting in the way of an otherwise picture-perfect view? If so, it’s time to grab a pair of arboring shears and start trimming.


12. Mix up perennial and annual plants.
Select a variety of perennial and annual plants that showcase their blooms, foliage colors, berries, or bark at different times throughout the year.
13. Leave room for evergreens.
Don’t forget to include evergreen shrubs for year-round structure and a touch of green even in the coldest months.
14. Brighten up with seasonal pops.
Supplement with seasonal annuals in pots or window boxes for bursts of color that can be easily swapped out. This ensures your front garden delivers beauty and freshness no matter the weather.
Improvise with hardscaping and other front yard curb appeal improvements.
If you live in a dry climate, it may not be reasonable or responsible to sustain a healthy green lawn while also being eco-friendly. For every square foot of grass you replace with sustainable landscaping, you are saving around 44 gallons of water.
Using gravel in lieu of grass is a practice that goes a long way back; rock gardens have been used in Japan and China for more than a thousand years, and their popularity isn’t going anywhere. They’re stylish, low maintenance, and easier to create than you think.
15. Create a gravel garden.
The type of gravel you’ll want as a top layer in your lawn or walkway will depend on how you intend to use the space. Finer gravel will feel better underfoot than larger, coarser pieces. In these cases, opt for gravel no larger than ¼ inch. You’ll have several types of gravel to choose from:
Pea gravel:
Small, rounded stones about the size of a pea. Pea gravel is available in a wider range of colors, and the smooth pebbles can give your hardscaping a polished look.
Crushed or decomposed granite:
This walkway stone is made up of small chunks that pack down well and is easily traversed (especially by strollers, wheelchairs, and other wheeled objects).
Crushed rock chips:
Larger rock particles that can’t be tracked on shoes inside the house, but might be uncomfortable to walk on barefoot due to jagged edges.
Once you’ve chosen your gravel, dig up your current turf to create a trench about 4 inches deep. Tamp down the soil beneath so it’s compact. Add a 2½-inch thick layer of crushed stone or gravel as a base, and cover with a layer of geotextile fabric (to prevent weeds or other growth from popping through). Then, add a 1½ inch layer of gravel as a top layer.
From there, you have a lot of options when it comes to decorating your new gravel garden. Raised garden beds or potted trees can add color and freshness without breaking the water bill. For added front yard curb appeal, you can easily install a flagstone patio or even a DIY fire pit as a cozy centerpiece to draw in even the pickiest of buyers.

16. Give your steps a makeover.
The journey to your front door is just as important as the door itself. Elevate the entire entryway experience by focusing on the path, steps, and illumination that guide visitors to your home.
Give your front steps some TLC. A good power wash can work wonders, or consider repainting them. For a more significant impact, add texture and dimension with beautiful stone overlays.
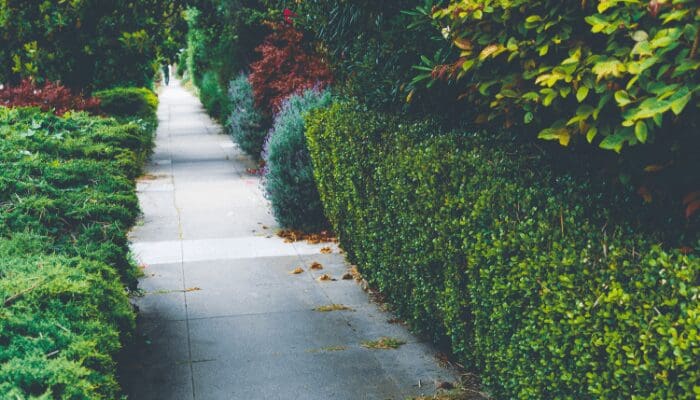
17. Line your walkway.
Line your walkways with low-maintenance plants or small planters to create a welcoming border. Ensure they are wide enough for comfortable foot traffic and in good repair to prevent any trip hazards.
18. Add strategic lighting.
Install landscape lights along your driveways, pathways, and near your entryway. This not only highlights key features for evening showings but also enhances safety and prominently displays your house number for easy identification.
Impress buyers with your amazing front yard curb appeal
There’s no need to call in the pros to get your yard looking pretty as a picture. With the right equipment and materials, you can boost your front yard curb appeal and make the outside of your home listing-ready. Before you know it, the Joneses will be scrambling to keep up with you.
Header Image Source: (romakoma/ Shutterstock)
- "Why We Shouldn’t Have Lawns," The National Wildlife Federation Blog (August 2024)
- "New Research Reveals Just How Much Homeowners Want to Have the Best Lawn on the Block," Weed Man (April 2025)
- "What Is the Ideal Height to Cut Grass?," HGTV (May 2024)
- "How to Get Rid of Weeds in Your Lawn," Family Handyman (October 2024)
- "Best Riding Lawn Mower Reviews 2025," Protool Reviews (April 2025)
- "How to Prevent Dog Urine Spots on Your Lawn," The Turfgrass Group (February 2024)
- "Solved! What to Do About Lawn Fungus," Bob Vila (March 2024)
- "How to Recognize, Treat, and Prevent Lawn Fertilizer Burn," Today's Homeowner (November 2024)
- "How to Prevent Root Burn: Causes, Symptoms, and Effective Solutions," Deep Green Permaculture (July 2024)
- "What Causes Brown or Dead Patches in Your Lawn?," The Spruce (April 2024)
At HomeLight, our vision is a world where every real estate transaction is simple, certain, and satisfying. Therefore, we promote strict editorial integrity in each of our posts.