Home Maintenance for Dummies: 10 Everyday Issues You Can Handle Without a Pro
- Published on
- 8 min read
-
 Amanda Derrick Contributing AuthorClose
Amanda Derrick Contributing Author
Amanda Derrick Contributing AuthorClose
Amanda Derrick Contributing AuthorAmanda is a mechanical engineer, business strategist, and real estate enthusiast. She's experienced in making a home look its best—remodels, material selection, budgeting, and interior design have all been constant activities as an innovative homeowner. Designing her own custom home (alongside her husband, the architect) has brought Amanda into the world of real estate in a big way.
Being a homeowner comes with a sense of pride. But when you panic at the first sign of trouble (a mysteriously clogged drain, broken appliance, or weird noises from the garbage disposal), you can check that ego at the door.
The good news is that many of your everyday, common home maintenance troubles are ones that you can tackle yourself with a little motivation and knowhow—and giving your home TLC throughout your years of ownership will pay off.
“A well-kept home is going to require a lot less upgrades and repairs when it comes to the time to sell,” says Flash Shelton, a 35-year veteran of the construction/handyman business and founder of the United Handyman Association. “A little attention will extend the life of most things.”
“The life expectancy is based on the average person letting things go untouched and only getting attention when they need to be repaired,” Shelton adds. “A little cleaning, oil, filter changes, weather sealing etc. can extend the life and even help some items last forever.”
You Googled “home maintenance for dummies” for a reason—so bonus points for your humility, and eagerness to learn.
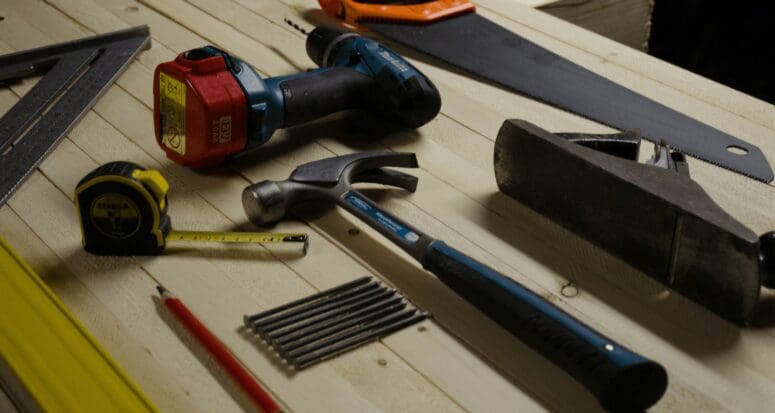
With the help of real estate and maintenance experts who could snake a tub and change out an HVAC filter backwards, in their sleep, we put together this list of 10 common home maintenance demands, with tips and step-by-step tutorials to get you through them.

Kitchen
Rescue and tune your garbage disposal.
I once discovered that someone (looking at you, wonderful husband) had put potato peels down our garbage disposal.
Word to the wise: Don’t do that. Ever.
Your garbage disposal can be a wonderful tool; it can also be smelly and clogged if you put the wrong things down there. Don’t panic and call a plumber just yet!
Home improvement expert Bob Vila has a great step-by-step for safely unclogging your garbage disposal and keeping it smelling fresh. His most important tip? Turn off the circuit breaker that your disposal is on so that you can unclog safely.
If you’re dealing with broken glass or dishware, you can use an Allen wrench to dislodge the material by twisting the hex-shaped hole at the bottom of the disposal. This trick alone can save you from a 5-minute handyman visit that costs you $85.
Your homeowner arsenal should also include a plunger like this one from Liquid-Plumr that is the correct shape for plunging a sink.
Vila also recommends putting half a lemon in your disposal every 2-3 weeks to keep it clean and fresh, or you can use a product like this top-rated Plink Garbage Disposer Cleaner and Deodorizer for regular maintenance and to keep your kitchen smelling fresh.
Brush up your stainless steel.
Stainless steel isn’t going to disappear from kitchens anytime soon. Wear and tear is also an inevitable part of life, especially in an area of the house that attracts everyone from kids to pets on a frequent basis.
If your sink has been beat up by a dropped pan or beloved Fido scratched your fridge, here are some tips to buff your stainless back to normal.
This kit from Siege for $22.64 is meant for your stainless steel sink and cookware. However the Today Show’s “Ask Lou” segment details how it can be used successfully for appliances as well! The process is simple:
- Start with the lightest pad.
- Add a little water.
- Be patient as you buff across the entire surface of the appliance, moving with the grain of your stainless.
Slow and steady is key, as Lou points out that you could be doing this for as long as 10 minutes to have it work. See the product in action with the video below (starting at minute 1:48).
Help your refrigerator keep its cool.
Is your refrigerator not as cold as it should be? It might be due to dust around the condenser coils.
Refrigerators in garages, where dirt is prevalent, or in homes with lots of pet hair can be particularly prone to dusty coils. Before you run out to buy a new refrigerator, it’s worth locating your coils and giving them a quick dusting by following these steps. Note that if you’re sensitive to dust you may want to wear a mask.
- Unplug your refrigerator.
- Locate the coils—either on the top, bottom, or the back of the unit—and remove a grille, if necessary.
- Use a coil brush like this one from Lowe’s to gently dust around the coils.
- Pull the brush out and use a vacuum to clean the dust off the brush.
- Repeat dusting until the brush comes out clean.
If your coils are on the back of your refrigerator, be careful not to pinch any cords or tubing as you move the unit to dust and replace it when you’re finished.

Bathroom
Save your shower drain from a hairy situation.
I’ve had long hair for the majority of my life—consequently, I’ve experienced more than a few slow shower drains. My go-to fix for this problem comes in two parts: “snaking” the drain and adding a great clog remover.
First, snaking your drain is the sure-fire way to help the water flow improve immediately.
While a wire hanger will do, I like to keep a few of these Vastar Clog Remover Cleaning Tools around since they bend with your pipes and do a better job at holding onto any hair or debris.
They’re simple to use, just remove your drain cover and push the clog remover or hanger down the drain. Wiggle and twist it a little, then pull it out. Wear disposable gloves and have a plastic bag ready to throw away your tool, because I guarantee that you aren’t going to want to see what you pull out of that drain.
After you’ve removed the worst of the clog, you should add a little liquid help. I use Clean Shot Drain Cleaner, and have never once had to call a plumber.
Whatever you use, follow the directions on the bottle exactly; this includes letting it sit, chasing with hot water, and any other special instructions.
If you’d rather go for a natural remedy then boiling water (as long as it’s a metal pipe and not PVC) or a solution of baking soda and vinegar (equal parts, dumped down the drain immediately after they’re combined, and left to sit for an hour) will also help break up a clog.
Unclogging drains not your idea of a good time? Yeah, probably not. To avoid the whole thing, or at least make it less frequent, you can grab a drain protector like this one from OXO for under $10 and keep a lot of that hair from ever making it to your pipes.
Quick fix for a ‘dirty’ faucet.
Here’s a common experience: you’ve cleaned your faucet, but the water is still coming out unevenly, or your water pressure seems low. It’s not leaking, so replacing the faucet seems like overkill. But why isn’t the water flow behaving like usual?
You’ve probably got a clog somewhere in your faucet, which can be worked out by replacing your faucet aerator. This is an easier to fix than you might assume—many faucets have aerators that simply unscrew.
The below video tutorial from This Old House, a nearly 40-year-old home improvement brand, demonstrates how to quickly swap out your aerator, which can usually be replaced for under $10 in just a few minutes.
Want to make sure you get a replacement that will work with your faucet? Remove the current one and take it to the hardware store with you.
Changing out an aerator also gives you the opportunity to add in a flow restrictor, if you’d like to conserve water in your home.
Deal with the randomly-running toilet once and for all.
Do you hear your toilet spontaneously refilling, even though it hasn’t been flushed recently? Does your toilet just keep running, long after a flush? You might be worried that the underlying problem is serious, but chances are it’s just your flapper.
The flapper is the rubber stopper inside the tank that lifts up when you flush to release water into the toilet bowl. The seal of the flapper is what stops water from constantly flowing into the bowl, and that seal can deteriorate over time.
The quick test to see if the flapper is the culprit? Take the lid off your tank while the water is running randomly and push down on the flapper. If the water flow stops then you know that the flapper seal is your problem.
To replace your flapper you’ll need to turn off the water source for the toilet, which is usually a valve on the wall near the tank.
Flush to drain the water, then take a good look at how your flapper attaches to the bottom of your tank.
It’s a good idea to take photos to remind you, while you take the flapper itself to the hardware store so you can buy an appropriate replacement—there is some variety, so make sure you pick a flapper that is identical to the one you’re removing.
Great news! Your new flapper most likely comes with instructions.
You’ll probably need to adjust the length of the chain (matching it to your old flapper is a great starting point) to get the flush to work just right.
Just follow the instructions, reference the photos you took before dismantling your old system, and you should be good to go. Toilet flappers usually run between $5-$10, which is lots cheaper than a visit from a plumber and will also keep your toilet from running up your water bill with its constant filling.
Utilizing your utilities
Out of sight and out of mind can be a real problem for some of the most critical appliances in your home. Here are some ways you can keep the systems hiding in your utility rooms running smoothly.
Breathe a little easier—change your HVAC filters.
The filters for your HVAC system can have an effect on the air quality inside your home.
A dirty filter hurts your HVAC equipment by slowing airflow, reducing your efficiency, and potentially damaging your unit. Not to mention the negative impact on your utilities bill from running an inefficient system!
Swapping a filter out is simple; just remove the old one, paying attention to orientation, and wash it out (if you’re using reusable filters) or replace it with an applicable option.
But how often should they be replaced? According to CNet.com, it’s more often than you think.
It will vary by your location, if you have pets in the home, and other environmental factors, so the best thing to do is take a peek at your filter once a week.
Hold it up to the light and see if you can see the light through the filter—if you can’t then it’s definitely time for a new one. After a few months of checking your filter routinely you’ll have a better idea of how often it should be replaced.
As far as selecting the replacement filter, you should refer to your manufacturer’s recommendations for your system.
Your owner’s manual should call out a recommend range for the Minimum Efficiency Reporting Value (MERV) rating that you should look for in replacement filters. Be aware that selecting a higher MERV rating isn’t always the right option because going too high may actually slow your airflow, as a dirty filter would.
The easiest way to remember to change your HVAC filters? Put your filter on recurring delivery online and you’ll always remember to check and change your filter when the new one arrives.
Free the lint from your dryer vent.
Every dryer has a lint trap that says something along the lines of “clean before each use” on it. By all means, do that! But even the most diligent of lint screen cleaners have buildup of lint in the venting system for their dryer as well. This can make your dryer inefficient or break, not to mention the 2,900 fires reported each year from dryers reported by the U.S. Fire Administration.
There are lots of pros out there ready to help you clean out your venting, but you can actually do it yourself pretty easily.
First, you’ll want a cleaning kit with the appropriate reach and brushes. This one from Deflecto is the top rated “Amazon’s Choice” and includes everything you need to spiff up your duct for about $20.
Then, clean out your regular lint screen compartment. A small vacuum attachment is handy here to suck out the small pieces that escape from the screen.
The Spruce has a great, photo-filled guide on how to clean on both ends of your vent system, either with the assistance of a power drill or using the brush manually.
You’ll need access to where your vent enters the wall (so pull that dryer out a bit) and where it exits your home to use the brush and clean out all the fuzz from your favorite socks on both ends of your vent system.
Keeping a vacuum handy will help you minimize the mess!
If your dryer is a newer model and still not performing after a good lint cleaning check to see if you have a moisture sensor—a dirty one can interfere with auto-dry cycles. Using your owner’s manual to locate the sensor, which is likely just inside the dryer underneath the door, clean it off with a cotton ball and some rubbing alcohol.
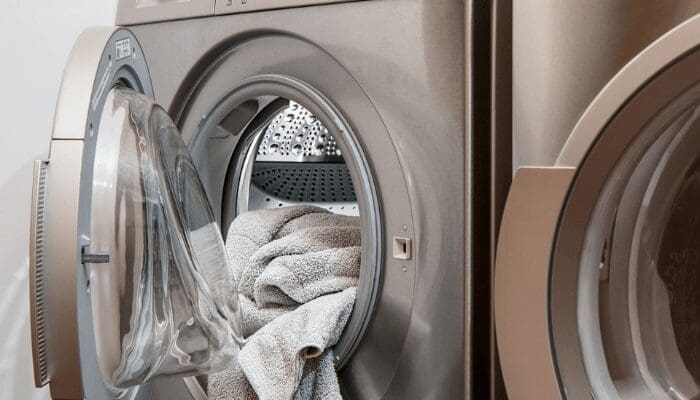
Keep your washer smelling as fresh as your wash.
Speaking of laundry, have you ever taken a load of towels out of your washer and thought they smelled wrong? Musty? Dirty? Like water on an amusement park ride?
It’s time to clean your washing machine, which is prone to lovely things like soap scum, mildew, mold, and other gooey stuff that you don’t want near your clothes.
Your washing machine is designed to have regular maintenance, just like the rest of your house. If you own a front-loading washer then you’ll want to pay extra attention, because they’re even needier in this department. Here are some things to do to clean up your machine:
Debris
Chances are, there’s something in your washer that shouldn’t be there. Pet hair, hair pins, random stuff from your pockets. Grab that random stuff out before every load to prevent it from going somewhere that hurts your washer in the long run. You can also give a dry washing machine drum a good vacuum with your hose attachments.
Rubber
Anywhere in your machine that has rubber—especially the gasket on a front-loader—probably has a spot where gross things can hide. If you really want to make life easier then keep a rag handy and wipe down rubber gaskets after each load. Gently pull back on that gasket to see what might be lurking behind it; any goop can be removed with a mix of vinegar and water.
Soap dispenser
If your rubber gasket isn’t the culprit for a stinky washer then check your soap dispenser. Water and vinegar can be used to clean up soap scum that builds up in the dispenser. You’ll have less build up if you’re careful not to overdo it on soap for each load.
Drum
The inside of your washer should be sanitized every few months. The easiest way to do this is putting a cup of bleach into the bleach dispenser section, or directly into the machine if you’re using an older washer. Run a hot wash cycle without any laundry to kill things like mold and mildew that might be in the washer. Newer machines also have tub-cleaning cycles.
Want to minimize how much cleaning you’ll have to do for the machine that’s supposed to be cleaning other things? Leave the door and soap dispensers open when not in use to prevent mold and mildew—just be careful of any pets or children that might be around the machines and prevent accidental access.
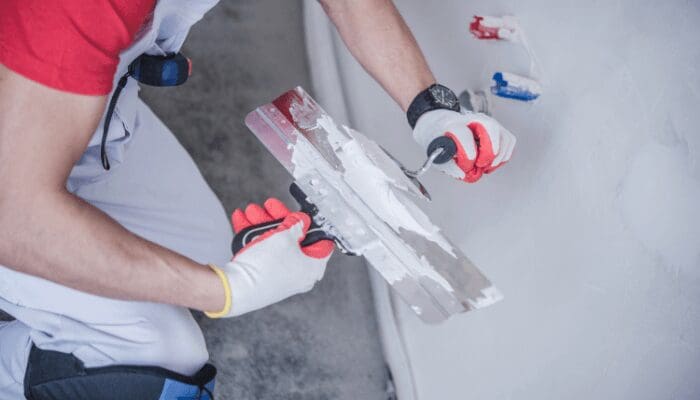
Bonus task: Patch up your drywall
Someone opens a door too hard, a piece of furniture being moved has a bump, your kids decide to practice their golf swing inside…and now you’ve got damaged drywall.
If your hole is small-ish then you’re in luck: this patch plus primer kit from 3M is highly reviewed and simple for homeowners to apply, even without drywall experience. The process is simple:
- Sand the edges of the hole.
- Apply the adhesive screen patch.
- Spread the putty across the patch with the included putty knife.
- Use the sanding pad to smooth the patch after it has dried.
Then add your own paint and you’re good to go!
Larger holes will require a little more finesse, which is where the pros at This Old House have you covered. Their method—fantastically detailed here in writing, photos, and video—can also be used for smaller holes if you’d rather not use a patch kit.
DIY or call a pro? How to know when you need a handyman
There you have it! Now you’re ready to go tackle 10 of the most common home maintenance tasks like the pros, keeping your home running smoothly and looking great.
Shelton adds that when it comes to home maintenance, you should call on a professional to get the job done right if you’re in over your head.
To determine if you need a handyman, consider:
- Which tools are required and how much they cost (sometimes it’s less expensive to hire a pro than to purchase the tools)
- Whether the job poses a risk to your safety
- If a DIY attempt would be a liability to your homeowners insurance
- The risk level of the job (if it’s a plumbing situation, are the pipes on the inside or the outside of the wall?)
“So many people upgrade their home and do a bunch of repairs for the sale of a home instead of enjoying these upgrades while they live there,” says Shelton. “A well-maintained home can be a sanctuary where an ignored home can be a money pit nightmare.”
Article Image Source: (Eugen Str/ Unsplash)
At HomeLight, our vision is a world where every real estate transaction is simple, certain, and satisfying. Therefore, we promote strict editorial integrity in each of our posts.