6 Pinterest-Inspired DIY Home Improvements for Beginners to Beautify Your Abode
- Published on
- 9 min read
-
 Lori Lovely Contributing AuthorClose
Lori Lovely Contributing Author
Lori Lovely Contributing AuthorClose
Lori Lovely Contributing AuthorLori Lovely edited the Real Estate Home section for the Indianapolis Star and covered the annual Dream Home construction and decor for Indianapolis Monthly magazine. She has written guides for selling houses and more.
When looking for DIY home improvement projects for beginners, you’ll discover endless ideas on Pinterest, the third-largest social networking site with over 335 million active users. Together, Pinterest users perform 2 billion searches and save more than 200 billion pins each month — so it’s safe to say there are plenty of DIY projects to explore.
If that sounds overwhelming, don’t worry. We combed Pinterest to provide you with the best DIY home improvement projects for beginners that will make your home look and function better.
We also talked to Brandie Mathison-Klein, a top real estate agent and single-family home expert who works with 81% more single-family homes than the average agent in Clermont, FL. She filled us in on which trendy projects can add value and marketability to your home down the line when it’s time to sell.

DIY your way to a more stylish home
In a recent HomeLight survey, 76% of agents report that home remodeling in their market has been on the rise since the Coronavirus pandemic began in spring 2020. If you’re one of the many homeowners looking to spruce up their living space, DIY projects are a fun and affordable way to get started. DIY also can help you learn new skills and existing ones.
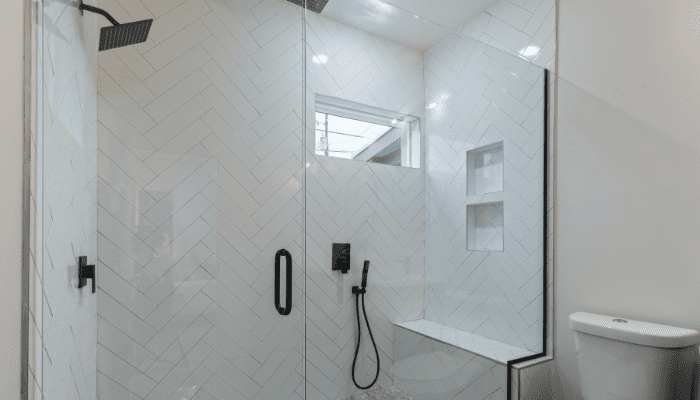
1. Spray paint your shower hardware for an easy update
One of the easiest home improvement projects for beginners is to update your hardware. New hardware instantly updates your interior, especially if your previous hardware was coated in ‘80s brass. If you don’t want to splurge on new fixtures, you can paint your old ones DIY-style.
“It’s costly to change out everything,” Mathison-Klein acknowledges. “Spray-painting faucets makes a big difference.” She recommends that homeowners choose a spray paint that creates a brushed nickel finish, one of the most popular finishes among homeowners (and buyers) today.
Materials and tools:
- Plastic drop cloth
- Coarse grit sandpaper
- Microfiber cloth
- Mineral spirit
- Painter’s tape
- Respirator mask
- Safety glasses
- Automobile spray primer
- High-gloss lacquer spray
- Rustoleum Universal Oil Rubbed Bronze spray paint
- Razorblade or utility knife
Instructions:
- Remove fixtures and hardware and place them on a covered work surface outside.
- Sand the items with 80 to 180 grit sandpaper to remove the existing finish and help the new paint adhere to the surface.
- Clean the items with a microfiber cloth and mineral spirit.
- Put on your safety glasses and respirator mask and apply two light coats of the automobile primer. Allow the primer to dry, and then flip the hardware to prime the other side.
- After primer dries, apply a light coat of spray paint. Repeat this step, so each side of the hardware has two to three coats of paint. Let paint dry in between coats. If your paint can includes instructions, follow those instructions instead for the best results.
- Let the final coat of paint dry for 24 hours before putting the hardware and fixtures back where they belong.
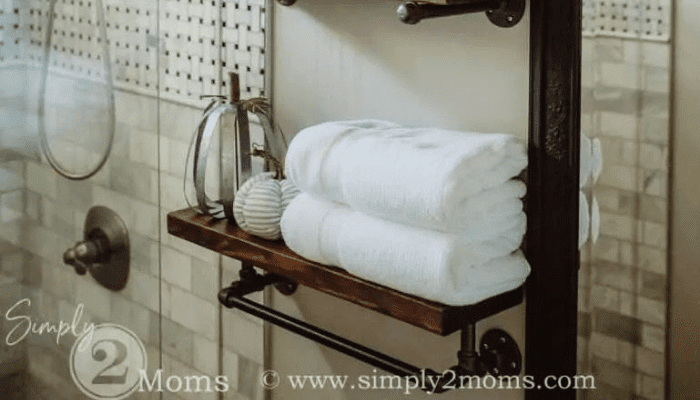
2. Build floating shelves with plumbing pipes for a touch of industrial or farmhouse style
Farmhouse and industrial design are still all the rage, according to Mathison-Klein. The best part about these interior styles is they embrace a rustic, lived-in aesthetic — a look that’s easy to create with DIY projects for beginners.
We love these DIY plumbing pipe shelves created by blogger and Pinterest aficionado Simply2Moms. These shelves are perfect for adding storage to a small bathroom, creating interest in the living room, or organizing a home office.
Materials and tools:
- Tape Measure
- Screwdriver/drill combo
- Level
- Pencil
- Brush or cloth (to apply stain)
- 8 3/4″ black iron floor flanges
- 4 3/4″ black iron cap fittings
- 2 3/4″ black iron T-fittings
- 2 3/4″ 90-degree elbow fittings
- 4 3/4″ x 8″ black iron nipples
- 2 3/4″ x 2″ black iron nipples
- 2 3/4″ x 3″ black iron nipples
- 1 3/4″ x 24″ black iron pipe
- 1 2” x 8” x 8’ board, cut into 3 2-foot-long pieces
- Wood stain of your choosing
- Spray polyurethane in a matte finish
- 24 2″ rust-proof screws for the floor flanges that attach to the walls
- 8 3/4″ long screws for the two floor flanges that hold the bottom shelf
Instructions:
- Start with clean iron pieces.
- Spray the fittings with polyurethane to seal them.
- Stain or paint the wood boards in your chosen color, following the directions on the paint or stain container.
- Beginning with the bottom shelf and towel bar, screw one of the floor flanges and one end cap onto each end of the 8″ iron nipples.
- Screw one floor flange onto the end of each of the 3″ nipples and the base of the T-joint into the other end. The floor flanges will attach to the underside of your bottom shelf.
- Screw the remaining two floor flanges into the 2″ nipples. Then screw the other side of the 2″ nipple into the backside of the T-joint.
- Attach the flanges to wall studs or use drywall anchors if you can’t locate studs.
- Position the first flange with the 3″ pipe facing upwards and screw into place. Use the level to make sure the flange on the other side is even. Mark the holes and screw in the second bracket.
- For each additional shelf, measure the desired placement and attach one of the flanges with an 8” nipple.
- Repeat the steps for leveling the shelf before securing brackets.
- Attach one elbow joint to the T-joint on the bottom shelf. Attach the 2-foot-long pipe to the other elbow joint before attaching it to the other T-joint. Finesse the pipe into the first elbow joint.
- Attach the bottom shelf to the upward-pointing flanges using the ¾” wood screws.

3. Design a sleek house number sign to welcome guests
Another fun DIY project for beginners is creating new address numbers. Easy-to-read house numbers help guests, emergency responders, delivery drivers, and others identify your home. Beyond function, new address numbers boost your curb appeal — a great bonus when it’s time to sell.
“Some don’t want to look at a house if the curb appeal is not good,” Mathison-Klein says, adding that an attractive exterior can add 5% to 11% to your home’s sale price.
Our favorite DIY house number project on Pinterest includes a baseboard and frame so you can easily attach the numbers to your exterior, regardless of its material. Customize the colors and house number style to suit your home’s architecture. For the best address number selection, head to Etsy or your local hardware store.
Materials and tools:
- Sanding sponge
- Wood glue
- Rag
- Mallet
- Drill
- 5/32 drill bit
- Measuring Tape
- Saw
- Micropinner
- 1/4” birch plywood
- Wood shims
- 5″ floating mount house numbers
- 1×2 ft. common board
- Wood stain or paint of your choosing
Instructions:
- Lay your house numbers on the plywood to determine how large you’d like the base.
- Draw cut-lines using a straight edge such as a ruler. Cut the base plywood.
- Place shims side-by-side with the thicker edge flush with the edge of the base plywood. Glue the shims to the plywood.
- After the glue dries, run the piece through the table saw so the board’s edges are straight. The shims should not extend unevenly over the base plywood.
- Sand the freshly cut sides of the plywood.
- Clean the board and then stain or paint the board following the directions on the container.
- Set the floating numbers on the board. Measure and mark for even placement.
- Use a 5/32 drill bit and a scrap piece of wood underneath the plywood. Drill all holes.
- Use the mallet to pound in the mounts gently .
- Using a miter saw, cut 45-degree angles into the 1×2-ft. board to fit around the base.
- Sand, clean, and paint.
- Attach the frame, using wood glue and starting with the long sides. Use a micropinner to hold the boards in place until the glue dries. After the long sides are dry, add the end pieces.
- Attach a picture hanging wire or sawtooth hardware to the back of the frame and mount the board to your exterior wall. If you have a brick or stone exterior, you can either use a masonry drill to secure anchors for attaching the frame or apply an adhesive like Gorilla Glue.

4. Build a simple, yet cozy fire pit
In HomeLight’s Top Agent Insights Report for Q3 2020, agents report homeowners are increasingly focusing on improving their outdoor spaces. Mathison-Klein shares that she’s also noticed more homebuyers seeking finished outdoor living spaces, especially since the start of the Coronavirus pandemic.
Tackle your first DIY home improvement project in the backyard with an easy-to-build fire pit. Fire pits provide a cozy gathering spot for family and friends even when the temperature begins to dip. Plus, our report reveals that fire pits are the number one outdoor upgrade homebuyers want to see in 2021, according to 54% of agents we surveyed.
Mathison-Klein confirms that this is an easy home improvement project for beginners since she and her husband just finished building a fire pit in their backyard with instructions on Pinterest.
Materials and tools:
- Shovel
- Level
- Broom
- Paver sand
- concrete landscaping blocks
- adhesive/sealant
Instructions:
- Find a safe spot for your fire pit that’s at least 10 feet from any structure.
- Measure and mark the ground the ideal width of your fire pit. To make a perfect circle for your fire pit, tie a string half the desired diameter of the circle around a stake. Using marking paint, make a circle on the ground.
- Using the shovel, remove the sod in a circle the desired size of your pit. If you intend to build your fire pit on a patio, place fire pit pads between the fire pit and the patio for protection.
- Once you’ve removed the sod, level the surface.
- Add paver sand as a base, making sure it’s level.
- Begin laying the concrete landscaping blocks.
- Use the level to make sure the first layer of blocks is level.
- Lay the second layer with blocks offset to help “lock” them with the other layer.
- Repeat for three to four layers, depending on how tall you want your pit.
- For extra durability, use adhesive to keep the blocks in place.
- You can either leave the floor of the fire pit sand or put a layer of flat pavers on the ground. Use a broom to brush paver sand into the spaces between the pavers to hold them in place.

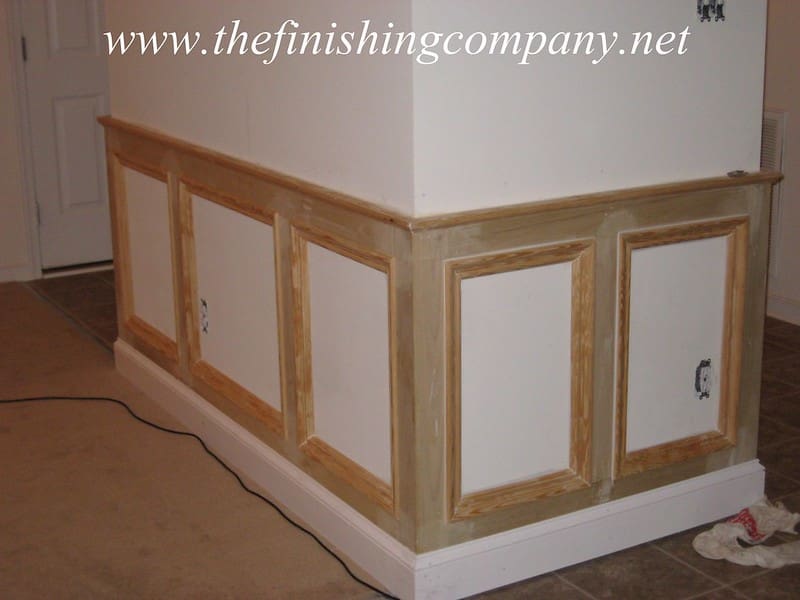
5. Transform a hollow-core door into a paneled door
Ready to take your DIY to the next level? Add a touch of sophistication to your plain, flat interior doors by creating a paneled look. This project may look intimidating at first, but with some patience and strict adherence to the adage “measure twice, cut once,” you can pull off this home improvement project for beginners.
Follow our directions to create a paneled door below and reference Remodelaholic for more details and step-by-step photos.
Materials and tools:
- Tape Measure
- Screwdriver
- Hammer
- Table saw
- Level
- Pencil
- Brush or cloth to apply stain
- 7 to 8 straight boards
- Plywood strips cut to 4”
- 4×8 sheet of ¼” cabinet-grade plywood
- 1” finishing nails
- 60 grit sandpaper
Instructions:
- Cut two boards the length of the door height.
- Trace the door handle hole, inside and out, using the existing door as a template.
- Sand the panels with 60-grit sandpaper to remove any rough edges.
- Align the boards to the left and right edge of the door and nail them in place with 1” finishing nails. You can substitute liquid nails.
- Measure and cut the horizontal boards: 6” widths are typical of vintage doors. Attach the same way, using a tape measure to mark placement, ensuring equidistant spacing.
- Rehang the door. Note: You may need to modify the door frame to adjust for the additional depth of the door.
6. Board and batten paneling adds a touch of sophistication
One of the most common, most affordable, and simplest ways to add appeal to a home is to paint the walls, baseboards, and trim. For a truly custom look, take it a step farther and adorn your walls with a board and batten look. Check out this board and batten tutorial by Lovely Etc, who boasts 49.5k followers on Pinterest.
Materials and tools:
- Nail gun or hammer
- Tape measure
- Level
- Palm sander
- Miter saw
- 1″ x 3″ common board or pine board the length of your walls
- 1″ x 2″ common board the length of your walls
- 1″ x 2″ common board for vertical battens (number of battens x height of battens)
- Finishing nails
- Paint
- Wood filler
- Paintable caulk
- Sandpaper
Instructions:
- Make a light pencil line at the desired height of the board and batten and at the desired spacing between the boards.
- Calculate the amount of wood required by measuring the length of the walls and the number and height of the battens.
- Using a miter saw, cut a 45-degree angle on the bottom of the vertical.
- Use the palm sander to smooth.
- Install the top 1×3 board first, checking the level to ensure it’s even.
- Install the 1×2 above it like a shelf.
- Next, install the battens the same way, measuring each one to allow for walls that aren’t square.
- Cut and smooth edges using the palm sander to smooth.
- Prime and paint the surfaces following the instructions on your primer and paint containers.
- Install using a level to ensure it’s even.
- Apply caulk around the edges of the boards and where the boards meet the wall.
- Prime and paint any bare surfaces following the instructions on your primer and paint containers.
Beautify your home, one DIY home improvement at a time
DIY home improvements for beginners are one of the most fun ways to update your home. Build your confidence and hone your skills by starting with the easiest projects first. Then work your way up to those with more elaborate instructions. You’ll thank yourself later when your home looks stylish — and eventually sells faster and for more money.
Hungry for more inspo? Follow HomeLight Pinterest for home improvement, interior design, and real estate tips and tricks.
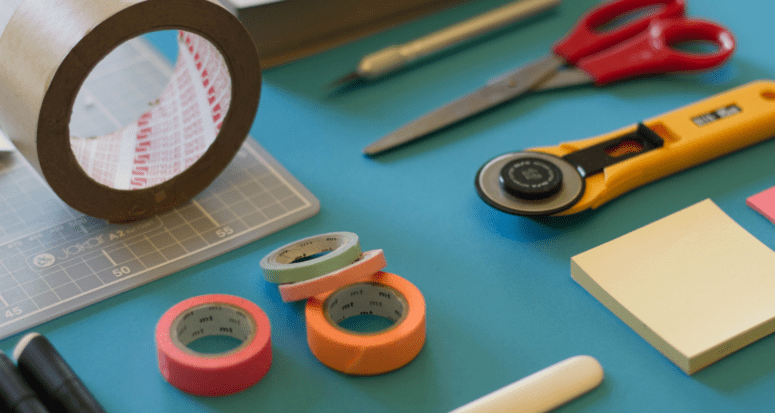
Header Image Source: (Jo Szczepanska / Unsplash)
At HomeLight, our vision is a world where every real estate transaction is simple, certain, and satisfying. Therefore, we promote strict editorial integrity in each of our posts.