
From Contract to House Keys: Breaking Down the House Closing Process
- Published on
- 15 min read
-
 Sandy John, Contributing AuthorClose
Sandy John Contributing Author
Sandy John, Contributing AuthorClose
Sandy John Contributing AuthorSandy John is a freelance writer and editor who specializes in real estate, homeownership, and personal finance articles. Previously the real estate editor for The Atlanta-Journal Constitution, her byline has appeared in several national and regional publications. Sandy has purchased homes in four cities and she has lost track of how many DIY home-improvement projects she’s done.
-
 Sam Dadofalza, Associate EditorClose
Sam Dadofalza Associate Editor
Sam Dadofalza, Associate EditorClose
Sam Dadofalza Associate EditorSam Dadofalza is an associate editor at HomeLight, where she crafts insightful stories to guide homebuyers and sellers through the intricacies of real estate transactions. She has previously contributed to digital marketing firms and online business publications, honing her skills in creating engaging and informative content.
You’ve found the perfect house, and the seller has accepted your terms. Congratulations — but don’t break out the champagne just yet! You still have to make it through the house closing process, where inspections, credit problems, or paperwork issues can trip you up.
The closing process takes several weeks as you navigate through multiple steps to make it to the closing table. Whether you’re a first-time buyer or have been through closing several times, it’s easy to overlook a step or miss a deadline.
Find a top real estate agent near you
We analyze over 27 million transactions and thousands of reviews to determine which agent is best for you based on your needs. It takes just two minutes to match you with the best real estate agents, who will contact you and guide you through the process.
We’ve talked to an experienced real estate agent who’s been through hundreds of closings, reviewed thousands of closing documents, and broken the house closing process into 17 steps. Keep this list handy as you move through the steps toward closing day, when you’ll finally get the keys to your new home.


How long does the house closing process take?
The typical loan closing takes 40 to 50 days. However, the National Association of Realtors (NAR) Confidence Index reported that in November 2025, contracts were closing within 30 days, consistent with both the previous month and year.
The closing process takes a month or so because so much happens within this period: house inspections, possible renegotiations with the seller, an appraisal, a title review, and approval of your mortgage applications.
Some of the steps can be carried out concurrently. For instance, you can lock in your mortgage rate while shopping for home insurance. It’s essential to stay on top of events leading up to the closing. A good real estate agent will be with you every step of the way, making sure things are progressing.
A typical house closing process follows these steps.
Step 1: Find a title company or lawyer to open an escrow account for you
Escrow involves using a neutral third party (not you or the seller) to hold earnest money while the closing process moves along. Depending on the customs or laws where the house is, you might use an escrow company, title company, or real estate attorney as an escrow agent.
Your real estate agent can recommend an appropriate person to handle the escrow account, and this detail will probably have to be included in the purchase contract for the home.
Step 2: Get a title review
You’ll also order a title review to make sure the seller has a clear title or a legal right to sell the house. A title company will go through public records and look for liens or claims against the property.
Step 3: Pay your earnest money
As part of your offer for the house, you probably offered a deposit, also known as earnest money. This needs to be deposited with the escrow agent, who may require a cashier’s check or wire transfer.
The idea behind earnest money is to show the seller that you’re serious about your offer. If you decide not to go through with the purchase, you could lose your earnest money if you back out for a reason that’s not supported in your purchase contract.
>Learn more: Want to see how much earnest money you should put down? Use our earnest money calculator to plan confidently and protect your offer!
Step 4: Submit the loan application officially
While you may have been preapproved for your loan, that doesn’t mean you’re done getting a mortgage. The lender needs to do their due diligence on the property you’re buying, too.
The lender will require you to fill out the application package again after receiving a copy of the contract from your agent, says Joe Maggio, a real estate agent in Manhattan, Kansas, with almost three decades of industry experience.
When you apply, be sure to ask your loan officer if the company needs any additional information or paperwork from you. If they do, respond as quickly as possible to prevent delays in approval.
In most cases, official approval shouldn’t be a problem if the lender did a thorough preapproval and your credit situation hasn’t changed.
“Reputable lenders do due diligence before they give a preapproval letter,” Maggio says.
Step 5: Review the Loan Estimate
The lender will give you a Loan Estimate form, a document that lenders provide to borrowers within three days of applying for a mortgage. It outlines the estimated interest rate, monthly payments, closing costs, and other key loan terms. Essentially, it gives you a clear snapshot of what your mortgage will cost before you commit.
Check all the details on the form and contact the lender if anything differs from what you discussed.
Details to check include:
- The spelling of your name
- Loan details, such as the term, whether it’s fixed-rate or adjustable-rate, and whether it’s conventional, FHA, or VA
- The loan amount and interest rate

Step 6: Order the inspection and any follow-ups
At the minimum, you should order a whole house inspection, also known as a general inspection, Maggio says. Depending on the age of the home and its mechanical systems, you may also want specialized inspectors to look at specific areas, such as the roof.
Additionally, the results of the general inspection may suggest you should bring in a specialist to confirm any problems and recommend corrective action, Maggio says. For example, a generalist home inspector will tell you there’s “abnormal granular loss on the roof shingles,” he says, but they usually won’t recommend a new roof. You may need a specialized roof inspection to determine if the situation calls for repairs or replacement.
Order the home inspection as soon as possible because your contract gives you a limited time — frequently 10 to 15 days — to submit any repair requests to the seller. You need time to schedule the primary inspection, get the report, order any specialized inspections based on the initial report, and receive those reports. Each step can take a few days.
If you don’t get the inspection completed and the repair request in on time, you end up waiving your right to ask for repairs, Maggio notes.
Step 7: Negotiate any repairs
The inspection and renegotiation period is the part of the house closing process where the deal most often breaks down, in Maggio’s experience. He has found that “structural issues that scare the buyers can be a deal-breaker.”
However, buyers can take what they’ve learned from their inspections and ask the seller to repair significant issues. Your agent will submit a list of repairs you want the seller to make, and you can negotiate from there.
Alternatively, if the issues are bigger than you feel comfortable tackling, you might decide to walk away from the contract. In that case, you could get your earnest money back if you have an inspection contingency and make the decision within the period the contract specifies.
You may also decide the issues are small enough that you can pay for the repairs yourself.
Maggio, who closes 99% of deals when he’s representing the buyer, says the only time he’s seen contracts fall through is when “the seller isn’t being realistic about repairs.”


Step 8: Order the appraisal
The lender will order an appraisal of the home to get an impartial professional’s opinion of its value. The house must appraise for at least the sales price listed in the contract for you to receive your mortgage, so it never hurts to confirm that the lender has scheduled the appraisal. Even though you, as the buyer, don’t order the appraisal, it’s necessary, and you’ll be charged for it. The charges will likely be included in your closing costs.
Step 9: Lock in your mortgage rate
You can lock in your mortgage rate anytime after the house is under contract. If you haven’t done it by now, you might want to activate the lock when you see a rate you like. The lender cannot lock the rate without your permission.
With a rate lock, the lender guarantees to hold the interest rate steady while your loan is being approved. Mortgage rates fluctuate frequently, and a rate lock provides assurance that you’ll end up paying the interest rate you planned on. If it’s not locked, the rate you’ll be charged could spike (along with mortgage rates in general), and your monthly payment would be higher than you expected.
If you’re satisfied with the interest rate you’ve got, eliminate the risk of higher rates by exercising your lock. Rates are locked for a specified period, such as 30 days. If you don’t expect to close in that period, you may be able to get a rate-lock extension.
Some locks include a float-down provision, which says if rates fall during the lock period, you’ll get the lower rate. Ask your lender about options such as a float-down if you’re interested in one.
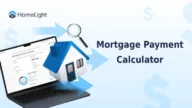
>Learn more: Don’t guess your monthly payment after locking your rate. Use our mortgage payment calculator to get an accurate estimate instantly.
Step 10: Negotiate price changes based on the appraisal
If the home appraises for less than the contract price, you have three options:
- Renegotiate the price with the sellers, requesting that they lower it to match the appraised value. You can also compromise by asking the seller to lower the price so it’s closer to the appraised amount, and you’ll commit to adding more of your own money to the deal, too. Remember, the lender won’t provide a loan for more than the appraised value, including your down payment.
- Cancel the contract and walk away if you have an appraisal contingency.
- Increase your down payment to cover the difference between the appraised price and contract price.
A fourth option might be to order a second appraisal if you think that the appraiser was mistaken or didn’t use the most accurate comparable sales. Talk to your agent about what to do if the appraisal is low.
If the home appraises for more than the contract price, pat yourself on the back. It looks like you’ve made a good deal. A high appraisal does not affect the closing, however.
Step 11: Find homeowners insurance
You will need homeowners insurance to close on the home. The lender requires you to have this as long as you have a mortgage, and you will have to provide proof at the closing. Lenders require insurance because the home serves as collateral for your mortgage.
However, buying homeowners insurance is a smart move in any event. The policy will cover you if your home suffers a major catastrophe, such as a fire. Insurance will also typically pay your living expenses while the home is undergoing insured repairs. Moreover, it covers your personal property and provides liability coverage if someone outside your family has an accident on your property.
If you already have an agent for auto insurance, talk to your agent about homeowners insurance. You may get a premium discount for having multiple policies with the same insurer. But it pays to shop around and compare policies to find the best deal.
If you’re buying a home in a flood zone, you will also have to buy a special insurance policy that covers flooding, which standard homeowners policies exclude. The National Flood Insurance Program provides flood policies, which you can buy through an insurance agent.


Step 12: Decide whether to buy title insurance
While it’s essential to buy homeowners insurance, title insurance for yourself is optional. It protects you in the future if someone claims to have rights to ownership of the property you’re buying or if there was a recording error in the title. The title review (see Step 2) is designed to catch these issues, and title insurance protects you against any problems that were missed during the search.
Even if you decide not to buy a policy for yourself, either you or the seller will pay for the lender’s policy, which covers the mortgage lender for the same kinds of issues. In some states, buyer and seller negotiate who covers that cost, and in others, the cost customarily falls on the buyer.
Step 13: Review the Closing Disclosure
At least three business days before your closing, the lender will provide a Closing Disclosure, a five-page form that lists the final details about your loan, such as:
- Loan amount
- Interest rate
- Monthly principal and interest (P&I)
- Estimated total monthly payment, including P&I
- Mortgage insurance, if required
- Amount you’ll pay each month to an escrow account to cover property taxes and your homeowners insurance premium
The Closing Disclosure also breaks out all the closing costs you’ll be responsible for, such as:
- Lender’s fees, such as application fees or underwriting fees
- Costs of services, such as appraisal, credit report, and settlement
- Prepaid items, which might include homeowners insurance, property taxes, and mortgage interest
The document also lists the amount of money you need to bring to the closing table. Review the Closing Disclosure closely, and contact your lender if you have any questions or if the amounts don’t align with previous estimates and documents.
Step 14: Arrange your wire transfer or get a certified check
You cannot write a personal check for the money due at closing. Instead, you must either provide a certified check or move the funds by wire transfer.
A few days before closing, consult the settlement agent to find out what is acceptable and get the information needed to make the wire transfer, including the bank routing numbers for the receiving account. It’s worth triple-checking this information, as this is a time in the closing process when buyers can be exposed to wire fraud.
Contact your bank to see how much time they need to process the payment. Order the check or money transfer with that timeframe in mind, leaving plenty of time to spare.
Step 15: Put the utilities in your name
You don’t want the utilities to be shut off when the sellers move out, so notify the local utility companies a few days before you take possession that the utilities should be operational and in your name effective on closing day.
If you’re moving to a new area and aren’t familiar with the local power and water providers, your agent should be able to provide contact information.


Step 16: Perform a final home inspection
A day or two before closing, you’ll do a final walkthrough of the home you’re buying. This is your chance to make sure agreed-upon repairs have been made and that the house is in the condition you expect.
Maggio suggests doing the final walkthrough after “the seller is packed up and has the home clean and in the condition they will present it to the buyer.”
Bring along a copy of the inspection report and a list of the requested repairs so you can make sure they’ve been completed. Test the home’s systems and major appliances to see that they are in working order.
Inspect the home for any damage that resulted from the seller moving out, Maggio says. He also suggests looking at floors that were covered by rugs and spots on the wall that were covered by artwork to make sure the rugs and pictures weren’t hiding any damage.
If you find problems, discuss them with your agent, who can suggest remedies, such as holding back some of the money in escrow until the items are fixed. If the issues are serious, you may even decide to delay closing until you’re satisfied with the repairs.
Closing On a House? Here's a Checklist to Keep You Organized
Closing on a house can be overwhelming, especially if it’s your first time. Keep track of where you are in the process, what you still need to do, and how long it will take with our checklist.
Step 17: Bring the essentials to closing day
Finally, the Big Day is here! While you could still face last-minute delays to closing, they’re less likely if you have diligently followed the steps we’ve outlined.
On closing day, head to the settlement office and be sure to bring with you these documents:
- Photo ID
- Cashiers check for all money due (unless you’ve already wired the funds)
- Proof of homeowners insurance
- Closing Disclosure
- Any other items the lender or title company has asked for
During closing, you will have to sign a variety of documents. The title agent or attorney handling the closing should explain what each document is. Use this opportunity to ask questions if you don’t understand something you’re supposed to sign.
These closing documents likely include:
- Promissory note, which makes you financially responsible for the loan
- Deed of trust or mortgage contract, in which you put your home up as collateral for the loan
- Title document, which verifies that there are no liens or other claims on the property
- Deed, which transfers ownership of the property from the seller to you
Some states require a real estate attorney to handle the closing, while others rely on title or escrow companies to manage the process. Knowing which rules apply in your state can save you time and prevent surprises.
Simplify your house closing journey
After you’ve signed everything and all the money has been exchanged, you finally own the house that went under contract a month or two ago. Congratulations, now you can uncork the champagne!
Navigating the house closing process can feel overwhelming with all the paperwork, inspections, and deadlines. Partnering with an experienced agent ensures you understand every step and avoid costly mistakes. Don’t do it alone. Let a trusted agent guide you smoothly from contract to keys.
Header Image Source: (Efrem Efre/ Pexels)
At HomeLight, our vision is a world where every real estate transaction is simple, certain, and satisfying. Therefore, we promote strict editorial integrity in each of our posts.